
Why Tile Grout Cleaning Matters for Every Facility
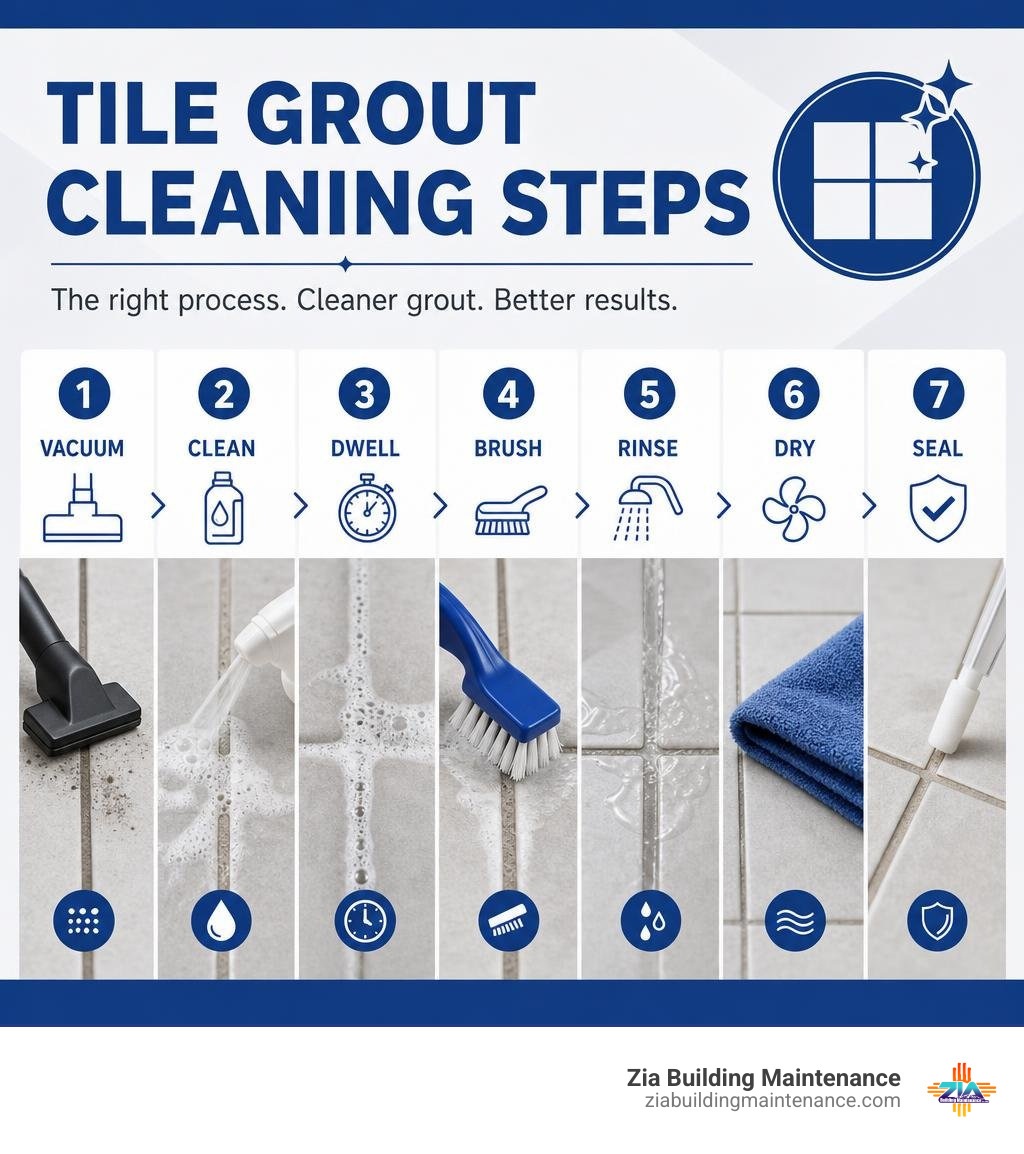
Tile grout cleaning works best when you use a surface-safe cleaner, give it time to work, scrub gently with a nylon grout brush, rinse fully, and remove the dirty water instead of spreading it across the floor.
- Sweep or vacuum first to remove dry soil.
- Use a pH-neutral or grout-safe cleaner suited to the tile material.
- Let the cleaner sit for the recommended dwell time.
- Agitate grout lines with a stiff nylon brush.
- Rinse with clean water and extract or dry the residue.
- Seal clean, fully dry cement-based grout to slow future staining.
Grout is porous, recessed below the tile surface, and quick to hold onto dirt, spills, grease, soap film, and moisture. That is why a floor can look clean after mopping while grout lines still appear dark or uneven. In busy facilities, worn-looking grout can also make an otherwise well-kept restroom, entryway, kitchen, or lobby feel neglected.
The right approach protects both the grout and the tile. Harsh acids, bleach, wire brushes, and dirty mop water can weaken grout, damage sealers, or leave residue that attracts more soil. Consistent care and periodic deep cleaning help maintain a cleaner, safer, more presentable space without disrupting daily operations.
I am Ashley Cordova, Vice President of Zia Building Maintenance, a family-owned New Mexico janitorial company serving clients since 1989. Through hands-on leadership in operations, sales, and quality-focused facility care, I have seen how dependable tile grout cleaning protects a building’s appearance and helps teams maintain the details that visitors notice.
The Science of Grout: Why It Gets Dirty and What to Avoid
To maintain tile floors effectively, it helps to understand what grout actually is. Standard cementitious grout is primarily composed of cement and sand. Looked at under a microscope, cementitious grout features a massive surface area filled with microscopic pores and void channels. It acts almost like a hard sponge, readily pulling in surface liquids, organic soils, grease, and airborne dust particles.
Because grout lines sit recessed slightly below the surface of glazed ceramic or porcelain tiles, gravity works against them. When custodians or homeowners mop with a standard string mop, dirty water runs off the smooth tile faces and pools directly in the sunken grout channels. As that water evaporates, it leaves behind concentrated soil and soap film, slowly darkening the lines over time. In fact, an average building accumulates up to 40 lbs of dirt, dust, and allergens each year, much of which winds up settling into lower floor crevices and porous surfaces.
In damp environments like restrooms, kitchen dish areas, or shower stalls, trapped ambient moisture combined with body oils or food spills creates an ideal breeding ground for bacteria, mold, and mildew. Understanding this science makes it clear why simple surface wiping fails and why careful chemical selection is critical.
What to Avoid When Cleaning Grout
When faced with stubborn grout discoloration, it is tempting to reach for the strongest chemical on the shelf. However, aggressive cleaning agents often do far more harm than good to both the grout binder and the surrounding tile finish.
Here are the primary products and tools you should strictly avoid:
- Harsh Acidic Cleaners (Vinegar, Muriatic Acid, Concentrated Acid Restorers): Acid attacks the alkaline cement binder in grout. While it may dissolve a microscopic top layer and briefly make grout look brighter, repeated acid use slowly dissolves the structural matrix, rendering grout powdery, weak, and even more porous. Furthermore, acids permanently etch natural stones like marble, limestone, and travertine.
- Undiluted Chlorine Bleach & Ammonia: Chlorine bleach kills surface mold temporarily, but it leaves behind high-alkaline salts that weaken grout structure over time and strip away protective sealants. Never mix bleach with acids or ammonia, as this releases deadly, toxic chlorine gas.
- Wire Brushes & Steel Wool: Metal bristles scrape away the sand matrix in grout lines, creating micro-fissures and rough gouges that hold onto dirt far more aggressively in the future.
- Oil- or Wax-Based Soaps: Products containing pine oils or natural waxes leave a sticky residue along grout joints that acts like a magnet for foot traffic dirt.
For a detailed breakdown of chemical compatibility and product choices, check out this guide on How to Clean Bathroom Tile Grout (Products That Actually Work) 2026.
How to Protect Tiles and Prevent Damage
Protecting your tile installation while restoring grout lines requires a deliberate, methodical approach. Before applying any chemical treatment, we always recommend pre-wetting the grout lines with clean warm water. Pre-wetting prevents porous, dry cement grout from instantly sucking up concentrated cleaning chemistry too rapidly, ensuring an even, controlled surface reaction.
Always select pH-balanced or mild alkaline presprays for routine maintenance. Neutral cleaners (around pH 7.0) protect factory glazes on ceramic tile and preserve the integrity of existing penetrating sealers. When physical agitation is required, use stiff-bristled synthetic nylon brushes designed specifically for grout channels. Nylon bristles provide sufficient firmness to dislodge embedded grime from recessed joints without scratching glazed tile surfaces or abrading natural stone.
For facilities with natural stone tiles—such as slate, marble, or travertine—ensure your cleaning chemistry explicitly states stone safety. Natural stone requires non-acidic, low-alkaline formulations to preserve soft mineral compositions and prevent costly, permanent surface haze or etching. You can learn more about general floor safety in our beginners guide to floor maintenance.
Effective DIY Strategies for Restoring Grout
For small offices, residential spaces, or routine spot touch-ups between scheduled commercial maintenance, effective do-it-yourself strategies can yield surprising aesthetic improvements without risking structural surface damage.
Best DIY Methods for Tile Grout Cleaning
The most effective, non-toxic household method for restoring stained grout lines combines simple baking soda (sodium bicarbonate) and hydrogen peroxide (3% standard household solution).
Baking soda acts as a mild, non-scratching abrasive poultice that draws out trapped grease, while hydrogen peroxide acts as an oxygen-based bleaching agent that breaks down organic stains without degrading cement binders. Adding a few drops of liquid dish soap helps cut through lipid grease in kitchen areas.
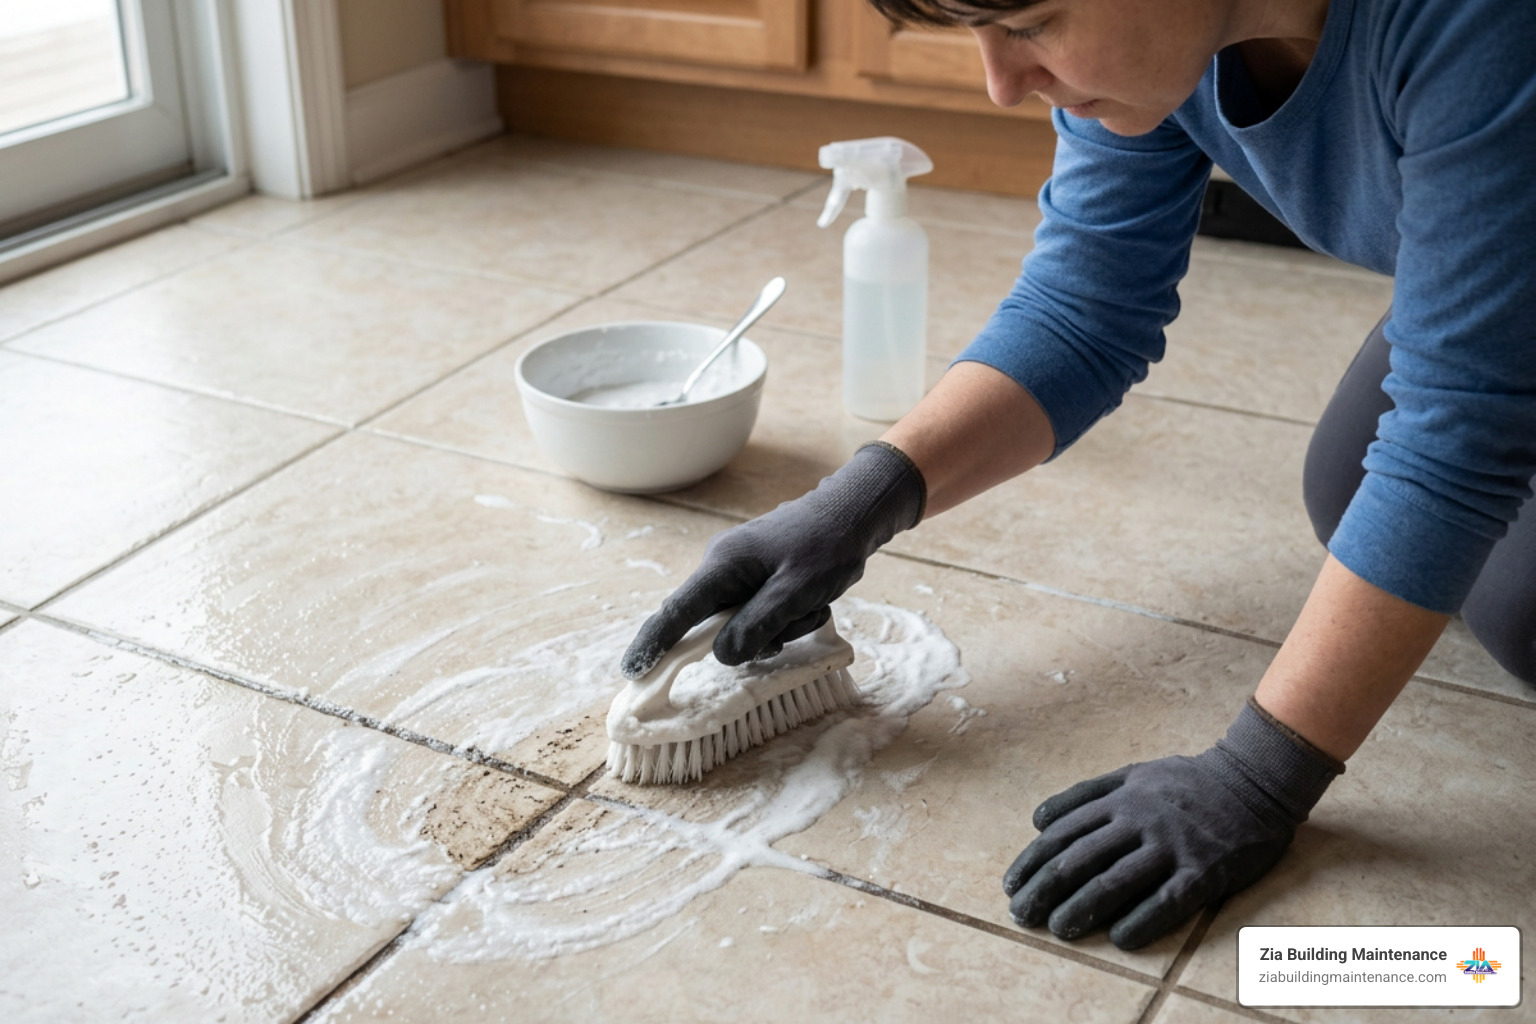
To use this method:
- Mix two parts baking soda with one part hydrogen peroxide until it forms a creamy, spreadable paste.
- Apply the paste directly into grout lines using a spoon or applicator brush.
- Allow the paste to dwell undisturbed for 10 to 15 minutes. During this period, tiny oxygen bubbles form, lifting embedded grime to the surface.
- Scrub along the grout lines using circular and back-and-forth motions with a stiff nylon toothbrush or dedicated grout brush.
- Wipe up the dirty slurry using a damp microfiber towel, then perform a final rinse with clean water.
For step-by-step instructions on natural options, review How to Clean and Brighten Grout Easily With Baking Soda and Peroxide as well as our own tested guide on a diy natural tile and grout cleaner that actually works.
Removing Stubborn Stains without Damage
When dealing with deep-set organic stains, hard water crusting, or heavy food spills, mechanical scrubbing alone can become exhausting and inefficient. The key to effortless stain removal lies in chemical dwell time rather than physical muscle power.
Applying an oxygen bleach solution (sodium percarbonate mixed with warm water) creates an active oxygen soak that penetrates deep into the grout matrix. Oxygen bleach brightens grout lines while keeping colored grouts completely intact, unlike harsh liquid chlorine bleach which can cause patchy fading.
Allow oxygen bleach or poultice pastes to dwell on the floor for at least 15 to 30 minutes. Keeping the paste damp with a light mist of water prevents it from drying out prematurely. Once the dwell period completes, the soil will have detached from the cement particles. At this point, you can easily lift the suspended slurry using a wet/dry shop vacuum or a microfiber mop without harsh scrubbing. For more insights on non-abrasive floor maintenance, see How to Clean Floor Tile Grout Without Scrubbing: The Effortless Method – Symboleo: Design Your Dream Home and explore our tips to make your albuquerque floors look brand new again.
Professional Tile Grout Cleaning vs. DIY Solutions
While DIY pastes and manual brushes work nicely for small localized areas, deep-cleaning high-traffic commercial spaces, large residential floor layouts, or severely neglected facility restrooms requires professional-grade power and extraction capabilities.
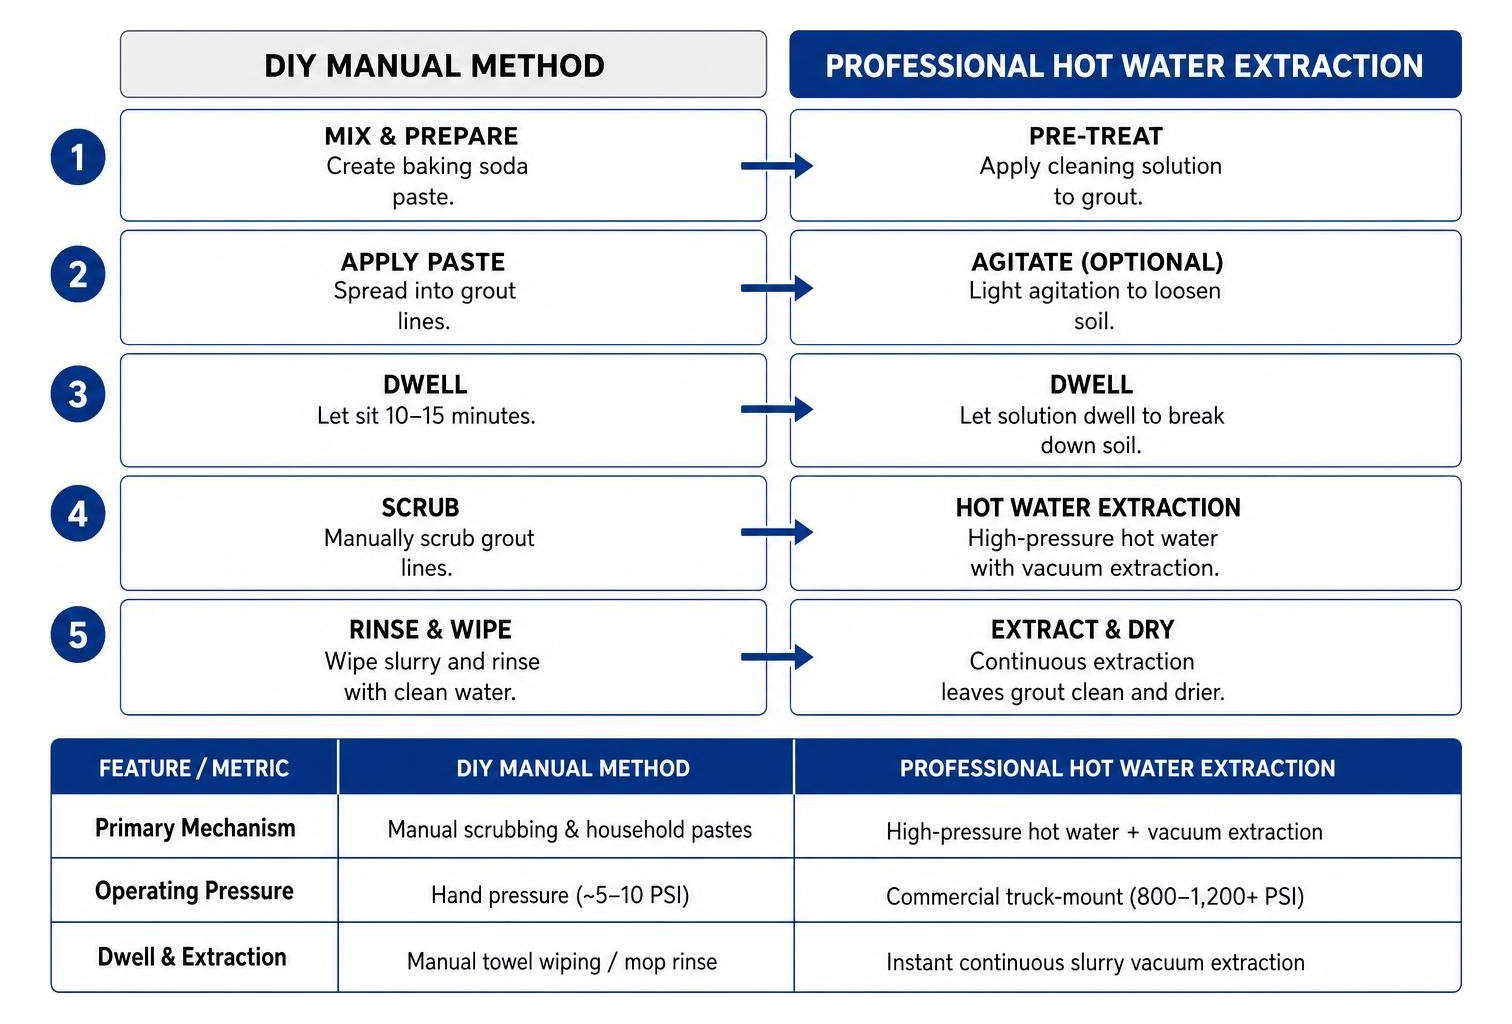
| Feature / Metric | DIY Manual Method | Professional Hot Water Extraction |
|---|---|---|
| Primary Mechanism | Manual scrubbing & household pastes | High-pressure hot water + vacuum extraction |
| Operating Pressure | Hand pressure (~5-10 PSI) | Commercial truck-mount (800 – 1,200+ PSI) |
| Dwell & Extraction | Manual towel wiping / mop rinse | Instant continuous slurry vacuum extraction |
| Allergen Removal | ~60% – 75% surface level | Up to 96.5% deep soil & allergen extraction |
| Speed & Efficiency | 20 – 50 sq. ft. per hour | 400 – 1,000 sq. ft. per hour |
| Surface Residue | Risk of leftover soap/paste film | Zero residue; fully neutralized & rinsed |
Commercial equipment utilizes enclosed rotary spinner tools connected to high-pressure hot water extraction systems. These machines blast heated water (up to 200°F) into grout pores at 800 to 1,200 PSI while simultaneously vacuuming up the slurry in a closed chamber. This dual action prevents dirty water from settling back into neighboring grout lines and eliminates sticky cleaner residues.
Professional tile and grout cleaning removes an average of 96.5% of common household allergens from grout pores, significantly improving indoor environmental health compared to standard mopping.
Essential Tools and Products for Tile Grout Cleaning
Achieving professional results requires matching the right tools to the specific floor challenge. The proper arsenal includes:
- Multi-Bristle Nylo-Grit Brushes: Stiff synthetic brushes designed to fit narrow grout channels.
- Wet/Dry Vacuum (Shop Vac): Essential for capturing dirty liquid slurry off tile floors during rinsing, preventing re-absorption.
- Alkaline Presprays (pH 10 – 12): Heavy-duty degreasers formulated to suspend lipid grease and embedded soils on ceramic tile.
- Penetrating Fluorochemical Sealers: Solvent- or water-based sealers that absorb into cement pores to repel water- and oil-based stains.
- Electric Spin Scrubbers: Battery-powered rotary brushes that reduce physical strain during spot agitation.
To learn more about selecting specialized cleaning agents, check out our guide unveiling the best grout residue cleaner for your tiles and explore the ultimate guide to finding the best tile grout whitener.
Steam Cleaning and Hot Water Extraction Capabilities
Commercial steam machines and hot water extraction wands provide chemical-free sanitization while safely flushing embedded grime out of floor cavities. High-temperature steam melts wax build-up, dissolves body oils, and kills surface bacteria without breaking the cement bond of properly cured grout.
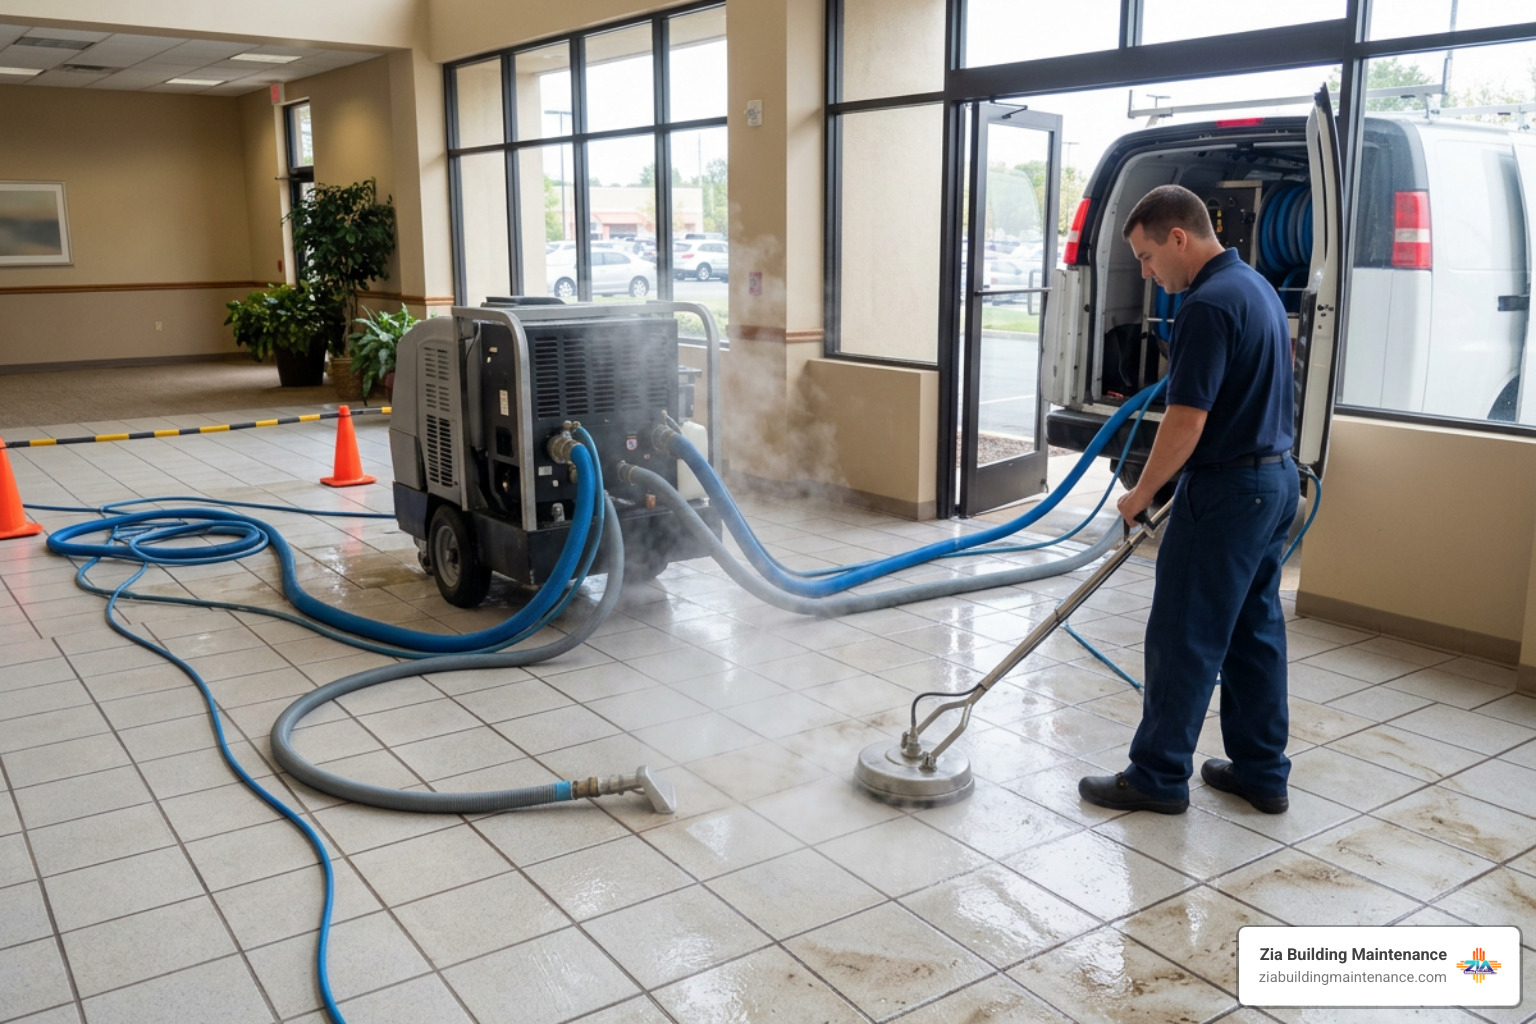
For heavily soiled facilities in Albuquerque, Rio Rancho, Corrales, and Los Ranchos, combining targeted pH-balanced presprays with high-pressure hot water extraction produces results that manual scrubbing simply cannot replicate. To review broader commercial cleaning capabilities, explore standard industry practices and read our overview on everything you need to know about floor cleaning service.
Preventative Care and When to Replace Grout
Cleaning grout is only half the battle; maintaining its appearance over time requires proactive preventive habits and knowing when structural repair is required.
How to Prevent Grout from Getting Dirty
Once grout is thoroughly cleaned, taking preventive measures will extend the life of your floors and significantly reduce cleaning labor:
- Apply a Quality Penetrating Sealer: Apply a clear fluorochemical penetrating sealer to clean, dry grout lines every 6 to 12 months in high-traffic commercial spaces (or every 1 to 3 years in lower-traffic areas). Penetrating sealers soak into cement pores, creating an invisible fluorochemical barrier that repels water and oil without leaving a plastic-like film.
- Implement Daily Dry Maintenance: Vacuum or sweep tile floors daily using soft brush attachments to remove dry gritty soil before foot traffic grinds it into grout lines.
- Use Squeegees and Microfiber Mops: In wet areas like showers or restrooms, squeegee walls after use and use flat microfiber mops that capture soil rather than redistributing dirty water like traditional string mops.
- Maintain Restroom Ventilation: Run exhaust fans during and for at least 15 to 20 minutes after peak wet usage to keep ambient humidity below 60%, suppressing mold and mildew growth.
- Clean Spills Immediately: Clean up coffee, wine, oil, or chemical spills as soon as they occur before they penetrate unsealed grout.
For related floor protection strategies, discover how to revive your floors the essential guide to stripping and waxing and read about our local albuquerque floor cleaning services that will make your tiles sparkle like new.
When to Consider Replacing Grout
No matter how well you maintain your floors, tile grout does not last forever. Cleaning alone cannot fix structural damage. You should consider replacing grout (regrouting) or consulting a tile specialist under the following conditions:
- Crumbling or Missing Grout: If grout lines are cracking, flaking, or missing entire chunks, water can seep beneath the tiles, leading to substrate rot and mold growth behind walls.
- Hollow Tapping Sounds: Tapping on adjacent tiles that produces a hollow sound indicates that the tile has debonded from the underlying thinset bed due to water intrusion.
- Persistent Rooted Mold: If black mold returns within 2 to 4 weeks after deep sanitization and sealing, mold hyphae have penetrated deep through the entire body of the grout matrix or into the wallboard substrate.
- Severe Irreversible Staining: When original cement has absorbed severe rust, dye, or petroleum stains beyond restoration, removing old grout with a mechanical grout saw and installing fresh grout is the most effective solution.
Frequently Asked Questions About Grout Care
How often should tile and grout be professionally deep cleaned?
To keep floors in optimal visual and hygienic condition, we advise scheduling a professional deep cleaning every 12 months. In high-traffic commercial kitchens, public restrooms, or healthcare facilities, a 6-month deep cleaning cycle is strongly recommended to control microbial growth, manage grease buildup, and maintain floor safety standards.
Can steam cleaning or hot water extraction damage grout?
When performed correctly by trained technicians operating at controlled pressures (typically 800 to 1,200 PSI) and appropriate temperatures, hot water extraction will not damage intact, fully cured cementitious grout. However, excessive pressure (over 1,500 PSI) or directed steam on unglazed soft natural stone, damaged grout, or unsealed older floors can loosen compromised joints. Professional equipment allows precise pressure adjustment to match the specific floor type.
How long must grout dry before applying a sealer?
Grout must be allowed to dry completely for a full 24 to 48 hours after deep cleaning before applying any penetrating sealer. Applying sealer over damp grout traps moisture inside the cement matrix, which can cause white efflorescence haze, sealer failure, or localized mildew growth beneath the sealed barrier. You can test dryness by placing a drop of water on the grout joint—if it instantly soaks in, the surface is ready for sealing.
Conclusion
Maintaining clean, healthy, and attractive tile floors does not have to be an overwhelming challenge. By understanding the porous science of cementitious grout, avoiding damaging acidic chemicals, and employing effective dwell-time cleaning strategies, you can preserve your building’s appearance while protecting your long-term flooring investment.
For daily upkeep, stick to simple pH-neutral cleaners, soft nylon brushes, and prompt spill care. When foot traffic, deep grease, or time creates stubborn staining across large commercial spaces, partner with experienced floor care specialists to restore your surfaces safely.
At Zia Building Maintenance, our family-owned team has proudly served commercial facilities across Albuquerque, Rio Rancho, Corrales, and Los Ranchos, NM since 1989. We bring attention to detail, commercial extraction tools, and dependable scheduling to every job. To learn how we can elevate your building’s image, explore our commercial tile cleaning service or contact our local team today to schedule your annual deep floor maintenance.