

To maintain sterile exam room surfaces, follow a two-step protocol every time: first remove visible soil with a detergent or cleaning agent, then apply an EPA-registered disinfectant and keep the surface visibly wet for the full labeled contact time. Document every completed cleaning on a room log. That sequence, grounded in CDC Environmental Cleaning Procedures and verified through EPA List N, is the foundation of effective infection control in any U.S. exam room.
The one-line action summary for staff:
- Wipe visible soil with a detergent wipe or cloth
- Discard that cloth and pick up a fresh one
- Apply an EPA-registered disinfectant to all patient-contact and high-touch surfaces
- Keep surfaces visibly wet for the full labeled dwell time (set a timer)
- Sign and date the room cleaning log before the next patient enters
Key Takeaways
Maintaining clean exam room surfaces consistently requires a two-step workflow, EPA-verified products, documented logs, trained staff, and regular audits to confirm the protocol holds under real clinic conditions.
| Point | Details |
|---|---|
| Two-step sequence is non-negotiable | Clean to remove soil first, then apply disinfectant; skipping cleaning voids the disinfection step. |
| EPA List N verification | Confirm every disinfectant’s EPA Registration Number on List N before adding it to your formulary. |
| Contact time must be met | Surfaces must stay visibly wet for the full labeled dwell time; wiping early negates efficacy. |
| Sporicidal agents for C. diff | Quaternary ammonium compounds are not effective against C. difficile spores; use an EPA-registered sporicidal agent. |
| Zia Building Maintenance | Zia provides tailored medical-office cleaning plans, EVS staffing, and QA audit support for facilities in Albuquerque. |
Table of Contents
- Why cleaning and disinfection in exam rooms follow the Spaulding framework
- Which surfaces to prioritize and how often to clean them
- Step-by-step procedure to clean and disinfect exam room surfaces
- How to choose disinfectants and verify surface compatibility
- PPE, worker safety, training, and supply management
- Protocols for spills, C. difficile, isolation rooms, electronics, and outbreaks
- How to monitor cleaning performance and audit compliance
- Common mistakes that undermine exam room disinfection
- Printable exam-room cleaning checklist staff can use today
- How Zia Building Maintenance implements exam-room surface protocols
- What actually works on the floor every day
- Zia Building Maintenance supports your facility’s exam-room cleaning program
- Sources
- FAQ
Why cleaning and disinfection in exam rooms follow the Spaulding framework
The Spaulding classification system gives every surface and instrument in a healthcare setting a processing level: critical, semicritical, or noncritical. Most fixed exam-room surfaces fall into the noncritical category, meaning they contact intact skin but not mucous membranes. Noncritical surfaces require cleaning and routine disinfection, not sterilization. Sterilization, which destroys all microbial life including spores, is reserved for critical instruments that enter sterile tissue or the bloodstream.
Understanding this distinction matters because it prevents two opposite errors: under-processing (wiping a surface with plain water and calling it done) and over-processing (wasting time and resources attempting sterilization on an exam table that only needs a low- to intermediate-level disinfectant). The Spaulding framework keeps your team working at the right level for each item.
Cleaning means physically removing soil, organic matter, and debris. Disinfection means applying an EPA-registered chemical agent to reduce pathogens on a surface to a safe level. These are sequential, not interchangeable. CDC guidance confirms that organic material can render disinfectants ineffective, which is why cleaning always precedes disinfection. Skipping the cleaning step does not save time; it voids the disinfection step entirely.
A peer-reviewed PMC review reinforces why this matters operationally: contaminated surfaces act as reservoirs for pathogens that transfer to patients primarily through hand contact. Cleaning and disinfecting those surfaces reduces their contribution to healthcare-associated infections, but the benefit only holds when the two-step sequence is followed correctly and consistently.
Label compliance is not optional. The product label specifies the required contact time, dilution ratio, and approved surface types. Following the label is both a regulatory requirement and an efficacy requirement. A disinfectant applied at the wrong dilution or wiped off before the dwell time expires has not met its label claim, regardless of how it smells or looks.
Which surfaces to prioritize and how often to clean them
Not every surface in an exam room carries the same infection risk. High-touch surfaces accumulate pathogens faster and transfer them more readily, so they need more frequent attention. Identifying them correctly is the first step toward a risk-based cleaning schedule.
High-touch surfaces in a typical exam room
The surfaces that staff and patients contact most often include:
- Exam table and armrests
- Pulse oximeter clip surfaces
- Countertops and procedure trays
- Exam chair and adjustment controls
- Door handles and light switches
- Keyboards, mice, and workstations on wheels
- Phones and call buttons
- Stethoscopes, blood pressure cuffs, and otoscope handles
Each of these items can carry pathogens from one patient to the next if not cleaned between encounters. A PMC review on hospital room surfaces notes that transfer occurs largely via hand contact, which is why high-touch items deserve priority over low-touch horizontal surfaces like window ledges.
Cleaning frequency by surface risk
CDC guidance recommends cleaning and disinfecting medical examination rooms at least twice daily, with emphasis on high-touch surfaces and floors. In practice, a risk-based schedule looks like this:
Between patients: All patient-contact surfaces (exam table, armrests, pulse ox clip, BP cuff, otoscope handle) and high-touch environmental surfaces (door handle, light switch, countertop).
At least twice daily: Broader environmental cleaning of floors and lower-touch horizontal surfaces.
End of day (terminal cleaning): Full room cleaning including walls at splash height, all equipment surfaces, floor mopping, and restocking of supplies and PPE.
Immediately: Any blood or body-fluid spill, regardless of scheduled cleaning time.
Using a risk-based checklist posted in the room removes ambiguity. Staff know exactly which surfaces to treat between patients and which ones belong on the daily or terminal schedule. For guidance on cleaning high-touch surfaces in clinical and office environments, a structured checklist approach consistently outperforms memory-based cleaning.
Step-by-step procedure to clean and disinfect exam room surfaces
This SOP-style sequence gives staff a repeatable, auditable workflow for every patient turnover and end-of-day cleaning.
Supplies and PPE required
Before entering the room, confirm you have:
- EPA-registered disinfectant (verified on EPA List N for your target pathogens)
- Detergent wipes or cleaning solution with fresh cloths
- Single-use disposable wipes or color-coded microfiber cloths (one set per room)
- Mop with a clean head for floor work
- Gloves (minimum); gown and eye protection if splash risk exists
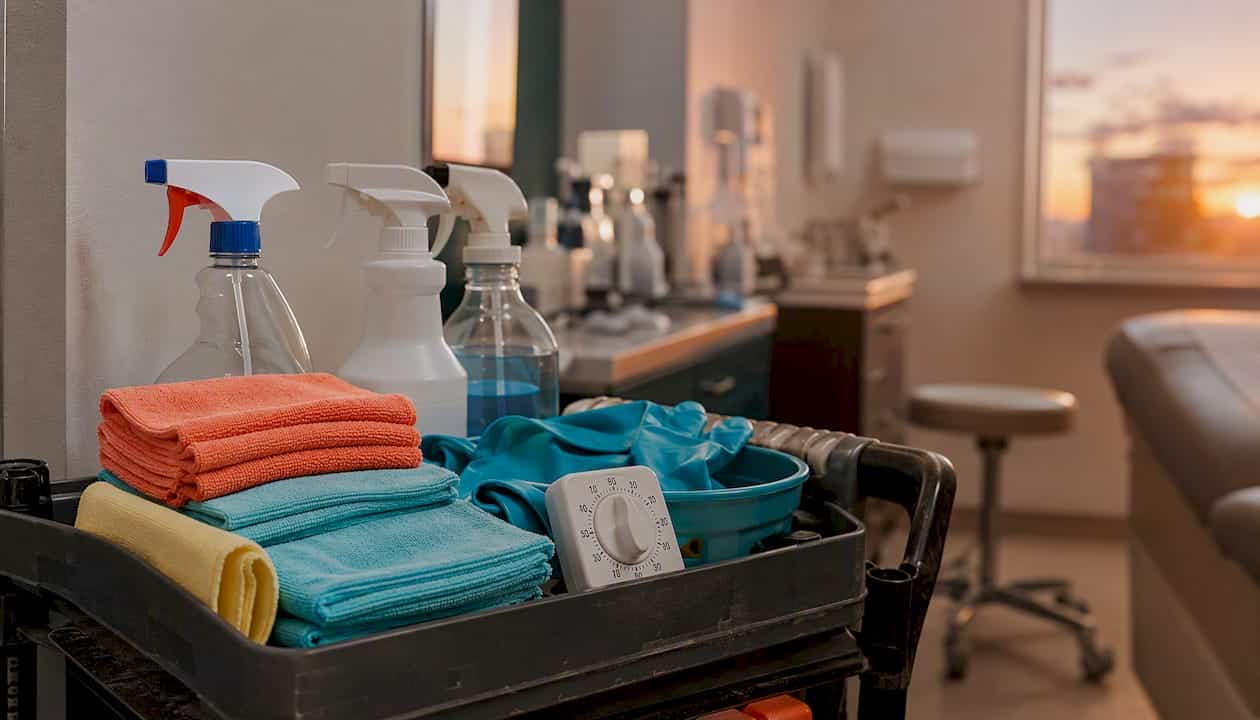
- Contact-time timer (phone timer or visual color-changing wipe)
- Spill kit (absorbent material, biohazard bag, PPE)
- Exam-room cleaning log
Numbered SOP steps
- Don PPE before touching any surface in the room.
- Remove visible soil first. Use a detergent wipe or damp cloth to physically remove any organic matter, blood, or debris. Discard the cloth immediately after use.
- Apply disinfectant top-to-bottom, clean-to-dirty. Start at the highest surfaces (overhead light handles, shelving) and work downward to the exam table, then countertops, then chair controls, then door handles. Always move in one direction; never backtrack a used cloth over a cleaned surface.
- Keep surfaces visibly wet for the full labeled contact time. Set a timer. Do not wipe surfaces dry early.
- Change cloths between zones. Use one cloth per surface zone (or per room for smaller spaces). Do not re-dip a used cloth into a clean solution container.
- Clean electronics separately. Use manufacturer-approved wipes or a product confirmed compatible with the device. Never spray directly onto a keyboard, monitor, or pulse oximeter. Use a single-use wipe and allow to air dry.
- Mop the floor using a clean mop head, working from the far corner toward the door.
- Inspect the room visually before removing PPE. Check that no surface was missed and that all supplies are restocked.
- Document completion on the room cleaning log: staff name, date, time, product used, and contact time verified. Post the log on or near the room door.
Pro Tip: Use color-changing disinfectant wipes or set a visible countdown timer at the room entrance. When staff can see the timer from the doorway, they are far less likely to cut contact time short during a busy clinic day.
Spill response follows a separate but related sequence: contain the spill immediately, don appropriate PPE (including face protection for large spills), remove gross soil with a detergent wipe, then apply an EPA-registered disinfectant appropriate for bloodborne pathogens per your facility’s exposure control plan. Document the incident in your spill log.
How to choose disinfectants and verify surface compatibility
Selecting the right disinfectant is not a one-time decision. It requires matching the product’s registered claims to your facility’s specific pathogens, surface materials, and workflow.
Selection checklist
Before adding any disinfectant to your formulary:
- Verify EPA registration: confirm the EPA Registration Number on the label and cross-reference it on EPA List N for SARS-CoV-2 and other target pathogens
- Confirm label claims for your target organisms (MRSA, C. diff spores, norovirus, etc.)
- Check required contact time and dilution; shorter contact times improve workflow compliance
- Review the Safety Data Sheet (SDS) for staff safety, storage requirements, and ventilation needs
- Confirm surface compatibility with your exam tables, equipment housings, and flooring materials
The CDC’s updated Guideline for Disinfection and Sterilization provides evidence-based guidance on disinfectant classes and their appropriate applications for both devices and environmental surfaces. Use it as your policy anchor when building or updating your formulary.
Disinfectant classes and surface compatibility
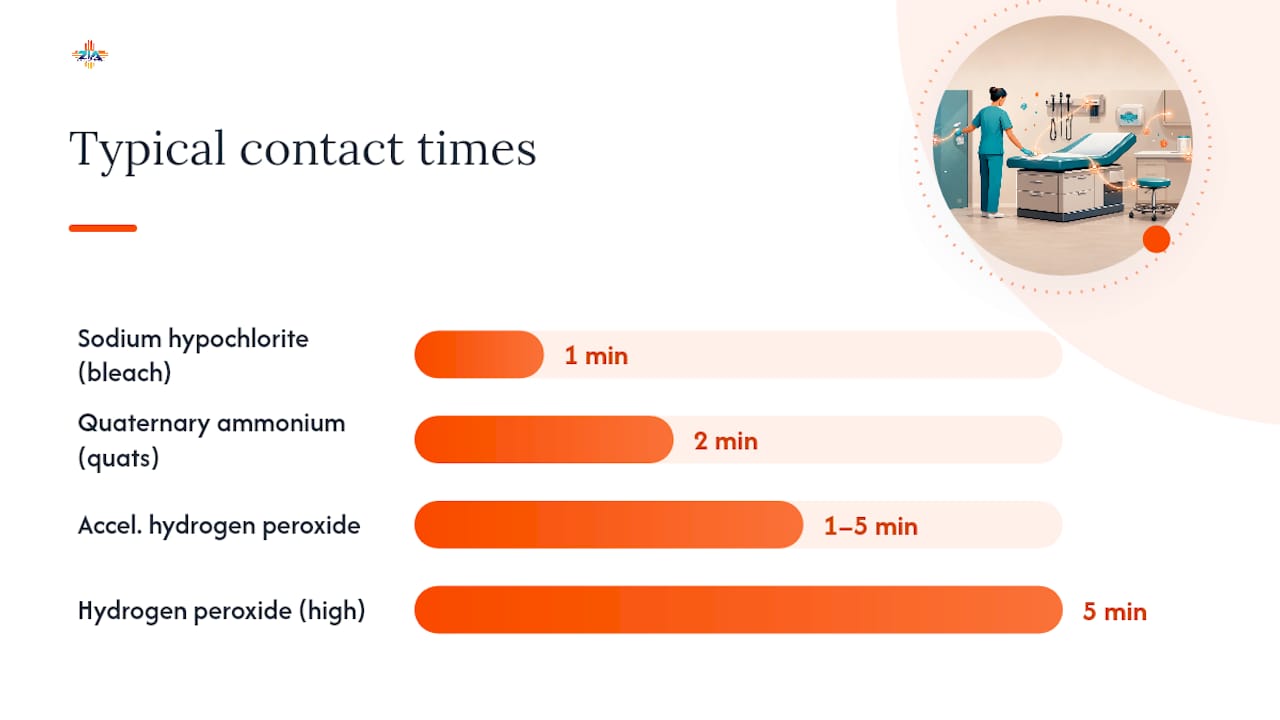
| Disinfectant Class | Typical Contact Time | Surface Compatibility | Sporicidal? |
|---|---|---|---|
| Quaternary ammonium (quats) | 2 minutes | Most nonporous surfaces; may degrade some plastics over time | No |
| Accelerated hydrogen peroxide | 1–5 minutes | Broad compatibility; gentler on metals and plastics | No (at standard concentrations) |
| Sodium hypochlorite (bleach) | 1 minute | Nonporous surfaces; can corrode metals and discolor fabrics | Yes |
| Hydrogen peroxide (higher concentration) | 5 minutes | Nonporous surfaces; check MIFU for sensitive equipment | Yes (at higher concentrations) |
For C. difficile or other spore-forming pathogens, select an EPA-registered sporicidal agent, typically bleach-based, and follow the labeled contact time precisely. Quaternary ammonium compounds alone are not effective against C. diff spores; substituting them in that scenario is a documented compliance failure.
Surface compatibility is as important as pathogen coverage. Bleach-based products can corrode stainless steel and degrade certain plastics with repeated use. Always check the manufacturer’s instructions for use (MIFU) for sensitive equipment like pulse oximeters and electronic blood pressure monitors before selecting a product.
Pro Tip: Maintain an indexed product file for every disinfectant in your facility. Each entry should include the EPA Registration Number, a saved copy of the label PDF, the current SDS, approved surface types, and the required contact time. Store it digitally so EVS staff and administrators can access it from any device during a shift.
Wipe formats versus dilutable concentrates each have a place. Pre-saturated wipes reduce preparation errors and are faster for between-patient turnovers. Dilutable concentrates are more economical for terminal cleaning and floor mopping but require accurate dilution and a reliable dispensing system. Choose based on your clinic’s throughput, supply chain reliability, and staff training capacity.
PPE, worker safety, training, and supply management
Cleaning staff are the last line of defense before a patient enters a room. Their safety and competency directly affect patient outcomes.
PPE baseline requirements
- Gloves: Required for all cleaning tasks, regardless of visible soil
- Gown: Required when splashing is possible or when cleaning up large body-fluid spills
- Eye and face protection: Required for high-volume spill cleanup or when using spray disinfectants at close range
- Respirator: Required per facility policy when cleaning rooms where aerosol-generating procedures occurred or during outbreak-specific ventilation scenarios
PPE must be donned before entering the room and removed carefully to avoid self-contamination. Hand hygiene follows PPE removal every time.
Training checkpoints for EVS and clinical staff
Competency in exam-room cleaning is not assumed; it is demonstrated and documented. A complete training program covers:
- Hands-on demonstration of the two-step clean-then-disinfect sequence
- Correct wipe and cloth handling (one cloth per zone, no re-dipping, no backtracking)
- Contact-time verification using a timer
- Spill-response drills including PPE donning sequence and biohazard disposal
- Review of the SDS and MIFU for each product in the facility formulary
- Competency assessment documented in the staff personnel file
Janitorial training requirements for healthcare settings go beyond general cleaning orientation. Staff working in medical environments need pathogen-specific knowledge, not just general housekeeping skills. Integrating EVS into the facility’s core safety culture, rather than treating it as a secondary function, consistently improves adherence and patient outcomes.
Supply management
- Set minimum stock levels per shift for disinfectant wipes, cloths, mop heads, and PPE
- Implement an expiration-monitoring system for chemical concentrates and pre-saturated wipes; expired products may not meet label efficacy claims
- Store all chemicals per label and SDS instructions (temperature, ventilation, separation from incompatible materials)
- Conduct a weekly supply audit to prevent stockouts during high-volume clinic days
Protocols for spills, C. difficile, isolation rooms, electronics, and outbreaks
Routine cleaning handles most situations. These scenarios require a deliberate deviation from standard procedure.
Blood and body-fluid spills
- Contain the spill immediately using absorbent material from the spill kit
- Don gloves, gown, and face protection before touching the spill area
- Remove gross soil with a detergent wipe; discard in a biohazard bag
- Apply an EPA-registered disinfectant appropriate for bloodborne pathogens; follow labeled contact time
- Dispose of all materials as regulated medical waste per facility policy
- Document the spill, response, and staff involved in the incident log
For additional clinical protocol guidance on managing contaminated surfaces, infection control resources from clinical practice settings offer practical procedural detail that complements facility-level SOPs.
C. difficile and spore-forming pathogens
Use an EPA-registered sporicidal agent, typically a bleach-based product, and follow the labeled contact time precisely. Quaternary ammonium compounds are not effective against C. diff spores. Do not substitute them in rooms where a confirmed or suspected C. diff patient was seen. Increase cleaning frequency and document every cleaning event during active cases.
Isolation rooms
Follow your facility’s isolation procedures and coordinate terminal cleaning timing with the clinical team. For airborne infection isolation (AII) rooms, allow the appropriate air-change cycles to complete before staff enter for terminal cleaning. For protective environment (PE) rooms, confirm with infection prevention before altering any cleaning product or method, since some disinfectants can affect immunocompromised patients.
Electronics
Use manufacturer-recommended disinfectant methods or wipes confirmed compatible with the device housing. Never spray disinfectant directly onto a keyboard, monitor, or medical device. Use a single-use wipe, apply to the surface, and allow to air dry. Maintain a dedicated set of cloths or wipes for electronics to prevent cross-contamination with other surface zones.
Outbreak scenarios
- Escalate cleaning frequency immediately upon notification from infection prevention
- Expand auditing: deploy ATP bioluminescence testing and fluorescent marker systems to verify coverage
- Document every cleaning action with staff name, time, product, and contact time
- Coordinate with infection prevention for targeted environmental sampling if surface contamination is suspected
- Review and adjust the cleaning formulary if the outbreak pathogen requires a different disinfectant class
Ventilation also plays a role in outbreak management. Indoor air quality guidelines can help facilities assess whether air-handling systems are supporting or undermining surface cleaning efforts, particularly in rooms where airborne pathogens are a concern.
How to monitor cleaning performance and audit compliance
A cleaning protocol is only as good as the system that verifies it. Monitoring gives administrators objective data to confirm that staff are following the SOP and that the protocol is actually reducing surface contamination.
Monitoring methods
| Audit Tool | What It Measures | Pros | Cons | Suggested Cadence |
|---|---|---|---|---|
| Visual observation | Technique, sequence, contact time | Real-time feedback; no equipment needed | Observer effect; subjective | Weekly per room or staff member |
| Exam-room cleaning log | Completion, product used, time | Simple; creates accountability record | Self-reported; does not verify quality | Every patient encounter |
| Fluorescent marker system | Surface coverage | Objective; easy to apply and read | Does not detect pathogens; requires UV light | Monthly or after training |
| ATP bioluminescence testing | Organic residue on surfaces | Quantitative; fast results | Does not identify specific pathogens; equipment cost | Monthly or during outbreaks |
Documentation requirements
Every room log entry should capture: staff name, date, time of cleaning, product name and EPA Registration Number, and confirmation that contact time was met. Retain logs per your facility’s record-retention policy, typically a minimum of one year for infection-control documentation. Logs feed directly into QA reviews and support regulatory inspections.
Duke Infection Control resources describe posting the cleaning log on the outside of each exam room door as a practical accountability tool. It documents completion after every patient encounter and gives leadership a real-time view of supply use and cleaning frequency without requiring a supervisor to be present in the room.
Audit cadence and corrective action
Conduct weekly visual audits and monthly ATP or fluorescent marker sampling as a baseline. When a room or staff member fails an audit, the corrective action sequence is:
- Immediate retraining on the specific failure point (contact time, cloth handling, missed surface)
- Intensified monitoring for that room or staff member for the following two weeks
- Swap to an approved product if the failure involved an incompatible or expired disinfectant
- Escalate to infection prevention if audit failures cluster in the same room or time period
Monitoring data should also inform product and method decisions. If ATP scores remain elevated after retraining, the issue may be product selection or surface compatibility rather than technique.
Common mistakes that undermine exam room disinfection
Even well-intentioned staff make errors that reduce disinfection efficacy. Knowing the most frequent ones helps supervisors catch them early.
Errors staff make most often
- Skipping the cleaning step: Applying disinfectant directly over visible soil is the single most common and consequential error. Organic matter shields pathogens from the disinfectant’s active ingredient.
- Not meeting contact time: Wiping a surface dry immediately after applying disinfectant is nearly universal in busy clinics. The surface must stay visibly wet for the full labeled dwell time.
- Re-dipping dirty cloths: Returning a used cloth to a clean solution container contaminates the entire container and spreads pathogens to every surface cleaned afterward.
- Using non-EPA-registered products: Consumer-grade cleaners or products not registered for healthcare use do not carry label claims for pathogen reduction and should not be used in patient care areas.
- Relying on paper table covers: Paper covers protect against direct contact but do not disinfect the underlying surface. The exam table must be wiped with an EPA-registered disinfectant between patients regardless of whether a cover was used.
For a closer look at commonly missed areas during disinfection, audit data consistently shows that keyboards, phone handsets, and workstation-on-wheels surfaces are the most frequently overlooked items in exam rooms.
Red flags for supervisors
- Inconsistent or missing room log entries across multiple rooms or shifts
- Repeated audit failures in the same room or by the same staff member
- Chemical stockouts or expired products found during supply audits
- Visible surface damage (discoloration, pitting, cracking) suggesting incompatible chemistry has been used repeatedly
Quick corrective actions
Immediate retraining is the first response to any audit failure. Swap to approved products when expired or incompatible products are identified. Perform intensified terminal cleaning when failures cluster in the same room. Adjust supply chain minimums to prevent stockouts that force staff to improvise with unapproved products.
Printable exam-room cleaning checklist staff can use today
This checklist is formatted for posting on an exam-room door or inserting into a staff binder. Adapt it to your facility’s specific products and room configuration.
Supplies and PPE (confirm before entering)
- EPA-registered disinfectant (verified on EPA List N)
- Detergent wipes or cleaning solution with fresh cloths
- Single-use or color-coded microfiber cloths (one set per room)
- Gloves; gown and eye protection if splash risk exists
- Contact-time timer
- Spill kit
- Room cleaning log
Between-patient steps
- Don PPE
- Remove visible soil with detergent wipe; discard cloth
- Apply disinfectant top-to-bottom, clean-to-dirty: overhead light handles → exam table and armrests → pulse ox clip → countertop → BP cuff → otoscope handle → chair controls → keyboard and mouse → phone → door handle and light switch
- Set timer; keep surfaces visibly wet for full labeled contact time
- Clean electronics with manufacturer-approved wipe; do not spray directly
- Inspect room; restock supplies as needed
- Sign and date the room log; post on door
End-of-day (terminal cleaning) additions
- Wipe all wall surfaces at splash height
- Mop floor with clean mop head, far corner to door
- Restock all supplies and PPE for next shift
- Complete terminal cleaning log entry
Spill response
- Contain spill; don full PPE including face protection
- Remove gross soil with detergent wipe; bag as biohazard waste
- Apply EPA-registered disinfectant; meet labeled contact time
- Document in spill log
Adapting for your clinic
High-volume clinics with dedicated EVS teams can assign between-patient cleaning to a float staff member and reserve terminal cleaning for the EVS crew. Single-provider or low-volume clinics may combine both roles. The checklist structure stays the same; only the staffing model changes. Host a printable PDF version on your facility intranet or shared drive and link it in your EVS training materials and audit program.
How Zia Building Maintenance implements exam-room surface protocols
Zia Building Maintenance has supported medical facilities in Albuquerque since 1989, and the operational model for exam-room cleaning reflects the same structured, documented approach described throughout this article.
Scope and scheduling
For medical office clients, Zia typically structures service in two tiers: between-patient support during clinic hours (high-touch surface cleaning, room log completion, and supply restocking) and nightly terminal cleaning that covers full room disinfection, floor care, and supply replenishment for the next day. The scope of work is defined in a written agreement that specifies which surfaces are covered, which products are used, and how often each task is performed.
Training and documentation
Zia staff working in medical environments receive training on the two-step clean-then-disinfect sequence, correct cloth handling, contact-time verification, and spill response. Competency is documented and available to facility leadership on request. After each cleaning event, the room log is completed and posted at the room entrance, giving clinical staff and administrators immediate confirmation that the room is ready for the next patient. This approach aligns directly with the exam-room cleaning standard work model that uses posted logs for accountability.
QA integration
Audit data from visual inspections and periodic ATP testing feeds back into Zia’s continuous improvement process. When a surface or area shows repeated audit failures, the response is retraining, product review, and an intensified cleaning schedule until the issue resolves. Facility leadership receives documentation of audit results and corrective actions taken.
For administrators drafting a scope of work with a janitorial partner, confirm these elements in writing: surface-by-surface cleaning frequency, specific EPA-registered products to be used, staff training requirements and documentation, room log format and retention, and escalation procedures for audit failures or outbreak scenarios.
What actually works on the floor every day
The protocols in this article are sound. What determines whether they hold up in a busy clinic is how they are built into the daily rhythm of the EVS team.
Between-patient cleaning in a well-run exam room takes roughly three to five minutes when the cart is pre-prepped and the staff member knows the sequence. That window is tight during a full clinic day, which is why pre-prepped carts matter so much. Stocking each cart with the correct number of cloths, a timer, and a fresh log sheet before the first patient arrives removes the decision-making that slows staff down mid-shift.
Color-coded cloth systems are one of the most practical tools available. Assigning a specific color to patient-contact surfaces and a different color to environmental surfaces (floors, walls) prevents cross-contamination without requiring staff to remember a complex rule. The color is the rule.
Wiping a stethoscope or blood pressure cuff in view of the patient does two things at once: it meets the infection-control requirement and it signals professionalism. Patients notice. That visible act builds trust in a way that a posted certificate on the wall never quite achieves. Duke’s exam-room cleaning resources specifically identify visible cleaning acts as a tool for reinforcing patient confidence alongside infection control.
When throughput pressure builds and compliance starts slipping, the right escalation path is to clinic leadership and infection prevention, not to informal workarounds. Persistent audit failures are a system problem, not just a staff problem. Addressing them at the system level, through staffing adjustments, product changes, or schedule restructuring, produces durable results. Retraining alone rarely holds when the underlying conditions haven’t changed.
Zia Building Maintenance supports your facility’s exam-room cleaning program
Medical facilities that need consistent, documented exam-room surface maintenance have a reliable partner in Zia Building Maintenance. Since 1989, Zia has delivered tailored cleaning plans for medical offices in Albuquerque, covering between-patient high-touch surface cleaning, nightly terminal cleaning, supply management, staff training on EPA-registered product use, and QA audit support. Every service plan is scoped to the facility’s specific rooms, patient volume, and infection-control requirements.
Administrators who are ready to formalize their EVS program can start by reviewing Zia’s commercial cleaning contract checklist to confirm that every infection-control requirement is captured in the scope of work. For facilities weighing the cost and operational benefits of outsourcing EVS, Zia’s professional janitorial services overview outlines the practical and financial case for a contracted cleaning partner versus in-house staffing. Contact Zia Building Maintenance to request a facility walk-through and a scoped proposal for your exam-room cleaning program.
Sources
These primary references support the protocols and guidance in this article. Each one serves a specific practical purpose for administrators building or updating their exam-room cleaning program.
- Environmental Cleaning Procedures | HAIs | CDC
- List N Advanced Search Page: Disinfectants for Coronavirus (COVID-19) | US EPA
- Cleaning Hospital Room Surfaces to Prevent Health Care–Associated Infections (PMC review)
- Guideline for Disinfection and Sterilization in Healthcare Facilities, 2008. Update: June 2024
- Exam room cleaning standard work (Duke Infection Control resources)
This article is general information, not a substitute for advice from a qualified doctor. Consult a qualified healthcare professional about your own circumstances before acting on anything here.
FAQ
What disinfectant should you use on exam room surfaces?
Use an EPA-registered disinfectant verified on EPA List N for your target pathogens. For routine cleaning, quaternary ammonium or accelerated hydrogen peroxide products work on most nonporous surfaces; for C. difficile, select an EPA-registered sporicidal agent, typically bleach-based.
What is the best way to clean a patient exam room between patients?
Follow the two-step sequence: remove visible soil with a detergent wipe first, then apply an EPA-registered disinfectant to all patient-contact and high-touch surfaces, keeping them visibly wet for the full labeled contact time. Document completion on the room log before the next patient enters.
Why does consistent disinfection of exam room surfaces matter for patient safety?
Contaminated surfaces act as reservoirs for pathogens that transfer to patients primarily through hand contact, as confirmed by a peer-reviewed PMC review. Consistent cleaning and disinfection reduces that transfer risk and is a core component of healthcare-associated infection prevention.
How often should exam room surfaces be cleaned?
CDC guidance recommends cleaning and disinfecting medical examination rooms at least twice daily, with high-touch and patient-contact surfaces cleaned between every patient encounter and a full terminal cleaning performed at the end of each day.
Can Zia Building Maintenance handle exam-room cleaning for a medical facility?
Yes. Zia Building Maintenance provides tailored medical-office cleaning plans in Albuquerque that include between-patient high-touch surface cleaning, nightly terminal cleaning, supply management, and QA documentation. Contact Zia to request a facility walk-through and a scoped proposal.