

Cleaning Grout vs. Whitening: DIY Hacks vs. Chemical Solutions
When you are staring down discolored grout lines in your restroom, it is important to know whether you are trying to remove surface grime or restore faded pigments. Cleaning grout removes surface dirt, grease, and soap scum, whereas using a bathroom grout whitener or reviver paints over deep, permanent discoloration with a fresh white coating.
Before applying any coating, you must start with a deep clean. If you apply a reviver over loose dirt or grease, it will not bond properly and will flake off within weeks.
To help you get the surface clean on a budget, we look to real-world tests of popular home cleaning recipes. A DIY test evaluating common household ingredients scored a simple baking soda and hydrogen peroxide mixture a impressive 9/10 for stain removal, while a vinegar and water solution scored a dismal 3/10.
When baking soda and hydrogen peroxide are combined, they create a chemical reaction that bubbles and sizzles, producing a foamy paste resembling watery shaving cream. The hydrogen peroxide acts as an oxidizing bleach alternative that lifts deep stains, while the baking soda acts as a mild abrasive to physically scrub away grime without scratching ceramic or porcelain.
Here is a quick look at how top DIY methods compare:
- Baking Soda + Hydrogen Peroxide (9/10): Excellent whitening power. Mix two parts baking soda to one part hydrogen peroxide. Apply directly with a stiff grout brush and scrub immediately.
- Baking Soda + Water (7/10): Decent for light surface maintenance, but lacks the stain-lifting power needed for yellowed or gray grout.
- Vinegar + Water (3/10): Disappointing performance for deep whitening. Vinegar is acidic and can erode cementitious grout over time without removing deep discoloration.
If you prefer homemade cleaning approaches, check out our guide on a diy natural tile and grout cleaner that actually works. You can also check out this helpful guide on How to Clean Grout for basic step-by-step techniques.
For severe mineral deposits, acidic chemical cleaners are sometimes used. However, improper chemical use can permanently ruin tile installations.
Damage Prevention: Chemicals and Tile Types to Avoid
It is easy to get aggressive when trying to clean tough bathroom stains, but harsh chemicals can cause permanent damage to tile and grout joints. Avoid these common mistakes:
- Harsh Bleach and Ammonia: Repeated applications of concentrated bleach or ammonia erode porous grout lines, weaken tile bonds, leave behind dirt-attracting residues, and fade colored grout.
- Acidic Toilet Bowl Cleaners: Toilet bowl cleaners contain strong acids designed for porcelain bowls. When applied to cement grout, they dissolve the cement matrix and loosen your tiles.
- Unglazed Tiles & Natural Stone: Highly acidic cleaners break down natural stones like marble, travertine, and limestone, causing dulling and etching. Always use pH-neutral cleaners on natural stone.
- Epoxy Grout Incompatibility: Top-coat grout revivers and latex-based whiteners are chemically incompatible with epoxy grout. They fail to adhere to non-porous epoxy surfaces and will peel off.
Before cleaning or whitening tile, review these 5 common bathroom cleaning mistakes you cant afford to make to protect your investment.
Choosing the Best Commercial Bathroom Grout Whitener Products
If a deep clean leaves your grout looking dull or unevenly faded, commercial bathroom grout whitener formulations deliver superior brightness and long-lasting protection.
Here is a breakdown of top-performing commercial products on the market as of 2026:
Zep Grout Cleaner & Brightener
For deep mineral stain removal, Zep Grout Cleaner & Brightener – 32 oz – Zep Inc. is a top choice among professionals. With over 1,171 customer reviews and a 59% 5-star rating, this acidic formula penetrates deep into porous grout without requiring back-breaking manual labor.
It features a low pH formula specifically engineered to dissolve hard water deposits, rust, and scale. For best results:
- Apply it to a small 2′ x 2′ tile section.
- Let it sit and penetrate for 2 to 3 minutes.
- Scrub lightly with a dedicated brush and rinse thoroughly with clean water to prevent redepositing dirt.
If you are dealing with leftover grout haze from a recent tiling project before applying a brightener, read our full article on unveiling the best grout residue cleaner for your tiles.
Sika Forever White Grout Reviver
When long-term mold resistance on wall tiles is your top priority, Sika® Forever White Grout Reviver | Grouts leads the industry.
This product contains Mould Shield® technology, an anti-bacterial solution tested in accredited microbiological labs to show zero mold growth after 10 years of simulated ageing. Sika Forever White comes in a squeeze tube with a built-in applicator head, making it simple to work into grout joints across shower walls and wet rooms. It is designed strictly for vertical wall applications and should not be used on floor grout.
GE Grout Whitener Pen
For targeted detail work, touch-ups, or small residential bathrooms, the Grout Whitener pen applicator is ideal.
This water-based acrylic dispersion coating features a convenient spring-loaded nib. A single 0.24 oz (7 mL) pen provides up to 196 linear feet of coverage and dries to the touch in approximately 60 minutes for a standard 1/8-inch joint.
Here is a comparison of top commercial whitening options:
| Product | Format | Coverage | Dry Time | Ideal Surface |
|---|---|---|---|---|
| Zep Cleaner & Brightener | Liquid Spray | ~200 sq. ft. | 2–3 min dwell | Floor & Wall Grout (Pre-cleaner) |
| Sika Forever White | Squeeze Tube / Sponge | ~50–100 sq. ft. | 3–4 hrs (24 hr cure) | Wall Tile Grout Only |
| GE Grout Whitener Pen | Marker Applicator | 196 linear feet | 60 minutes | Wall & Accent Tile Lines |
Step-by-Step Guide: How to Apply Bathroom Grout Whitener Correctly
Applying a bathroom grout whitener requires careful preparation to ensure proper adhesion and long-lasting brightness.
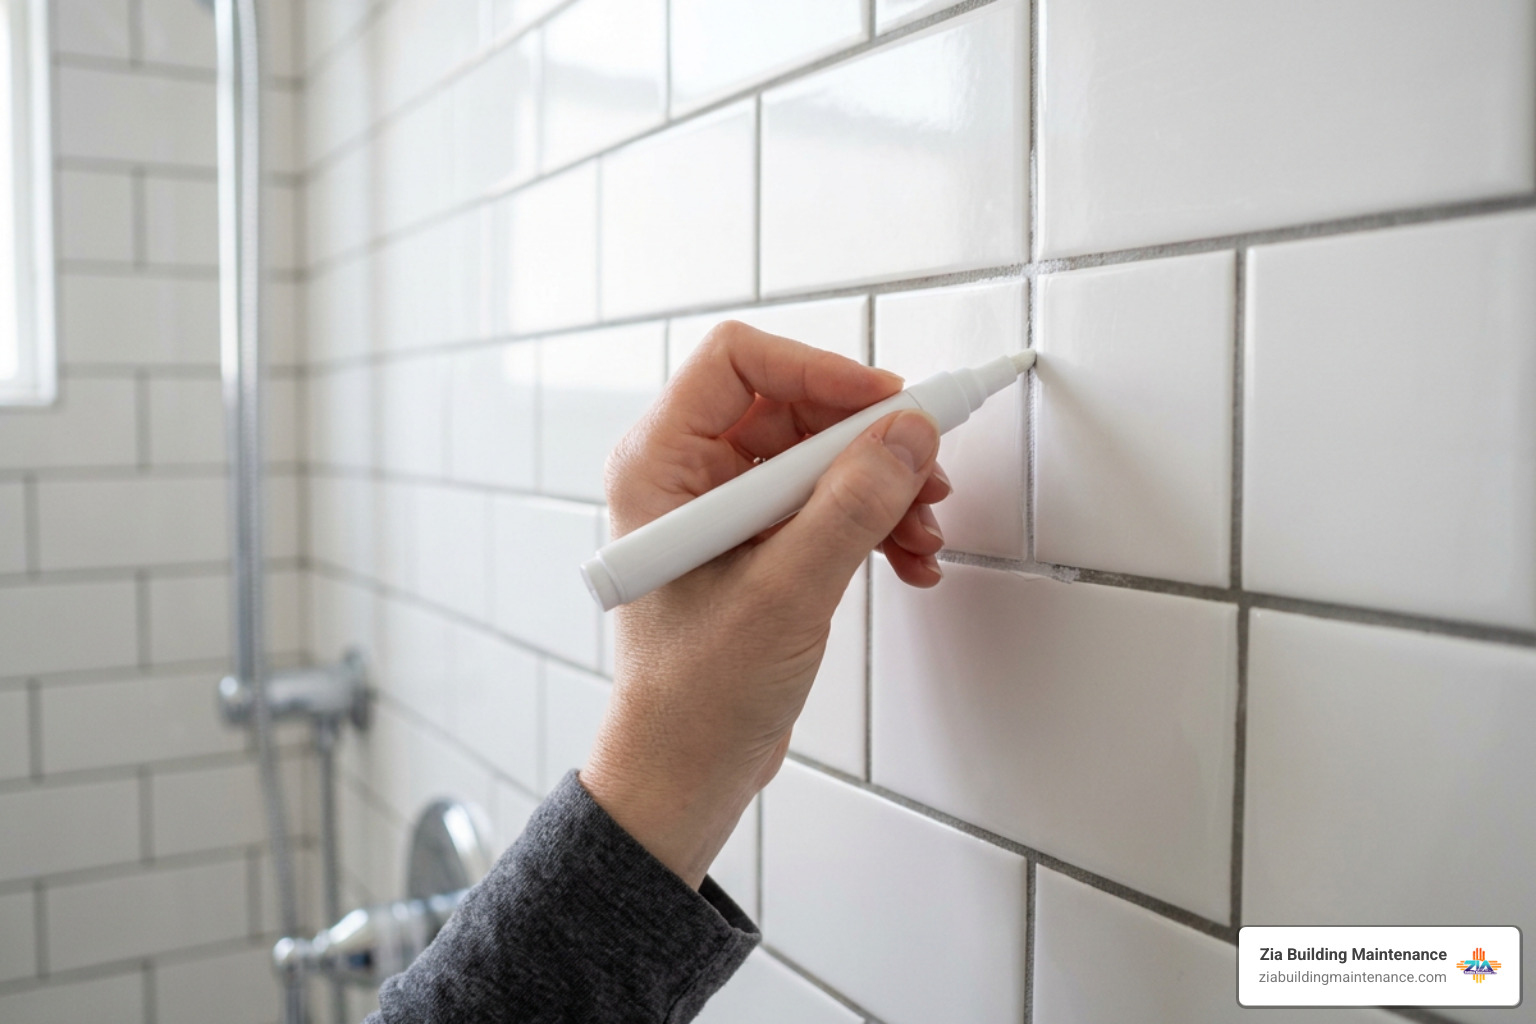
Check out this quick video demonstration showing how discolored grout lines are restored:
wp:html
/wp:html
wp:html
/wp:html
Preparation and Surface Inspection
Before opening your grout whitener tube or pen, prepare the surface thoroughly:
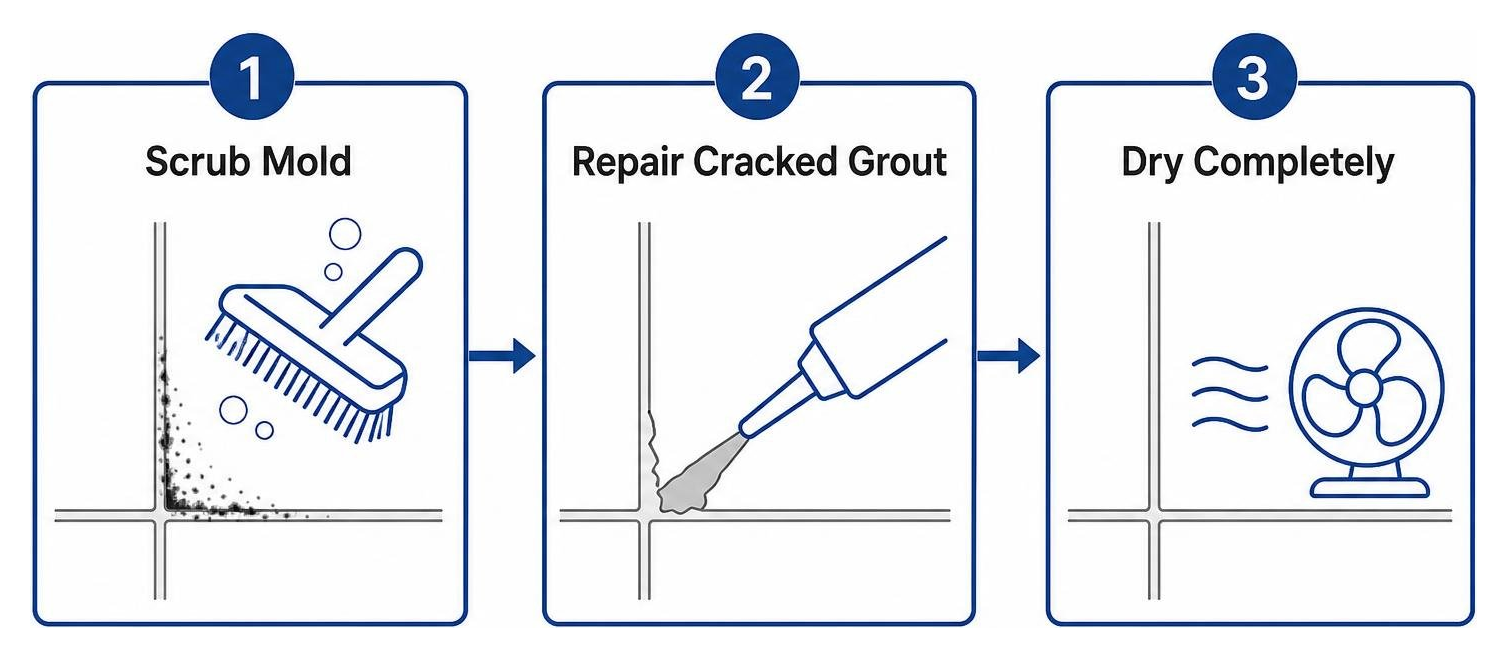
- Active Mold Eradication: Treating active mold with a fungicidal wash or dedicated mold remover is non-negotiable. Whitening coatings sealed over live mold spores will bleed through or peel away.
- Structural Repairs: Rake out and replace any cracked, crumbly, or missing grout. Whitening coatings cannot structural bridge broken grout lines.
- Deep Clean & Degrease: Scrub away soap scum, oils, and body washes using a neutral or light acidic cleaner.
- Complete Drying: Allow the substrate to dry completely. Trapped moisture prevents liquid coatings from bonding.
- Dust Removal: Vacuum or wipe away all loose particles and dust prior to application.
For detailed steps on deep cleaning commercial facilities before applying surface coatings, review our guide on how to give your restroom a professional deep clean.
How to Apply a Bathroom Grout Whitener Pen or Reviver
Once your grout is clean, intact, and dry, follow these step-by-step application rules:
- Prime the Applicator: If using a pen, shake the barrel thoroughly with the cap on, remove the cap, and depress the nib repeatedly on a piece of scrap cardboard until liquid flows. For squeeze tubes, apply in a smooth zig-zag motion directly over the joint.
- Work Bottom-to-Top: When applying revivers or pens on vertical shower wall joints, move from the bottom upward. This prevents runs and helps maintain precise fluid control.
- Apply Sparingly: Apply an even, light coat directly into the grout channel. Avoid excessive over-application onto adjacent tile faces.
- Wipe Away Excess: Keep a clean, damp cloth or sponge handy. Wipe away over-spray or product residue from tile faces immediately before it dries. If using Sika Forever White reviver, let the product set for 3 to 4 hours, then dampen tile surfaces slightly to wipe away dried haze.
- Observe Cure Times: Allow pens to dry for at least 60 minutes before light use. Avoid exposing reviver coatings to direct water sprays or humidity for a full 24 hours.
If you oversee a large commercial facility in Albuquerque or Rio Rancho and need routine floor and tile care, explore our specialized commercial tile cleaning service options.
Maintaining Your Bathroom Grout Whitener and Preventing Mold
After spending time whitening your grout, proper routine care keeps it looking pristine:
- Apply Grout Sealer Every 6 to 12 Months: Standard cementitious grout requires a clear, penetrating solvent-based or water-based fluoropolymer grout sealer once or twice a year to repel water, dirt, and oils.
- Implement a Daily Squeegee Routine: Encourage users to squeegee shower walls down after use. Removing standing water cuts down on mold growth by up to 80%.
- Weekly Light Cleaning: Scrub tiles weekly using a mild, pH-neutral bathroom cleaner. Avoid harsh abrasives that can scratch away your fresh white coat.
For more maintenance tips, review our breakdown of top methods to deep clean your bathroom.
Frequently Asked Questions About Bathroom Grout Whitening
Can grout whitener be used on floor grout or only on walls?
It depends on the product formula. Grout pens like the GE Grout Whitener can be used on both wall and light-traffic floor tile joints. However, heavier liquid coatings like Sika Forever White Grout Reviver are engineered strictly for vertical wall applications. They lack the wear resistance required to handle foot traffic, heavy shoe friction, and aggressive floor scrubbing. Always check manufacturer specifications before applying a whitener to floor grout.
How long does a grout whitener treatment last?
When applied over clean, dry, and mold-free grout, high-quality acrylic and latex-based grout revivers typically last between 1 to 3 years in residential bathrooms. Advanced formulations containing antimicrobial agents—such as Sika’s Mould Shield technology—have been tested to resist fungal and mold growth for up to 10 years under simulated aging conditions. Product longevity ultimately depends on daily water exposure, room ventilation, and whether you use harsh acidic cleaning chemicals that wear down the surface layer.
How often should you clean or re-whiten bathroom grout?
Routine surface cleaning should take place weekly or bi-weekly using a pH-neutral cleaner. Re-whitening or touching up grout line coatings generally only needs to happen every 12 to 36 months, depending on wear and humidity levels. For more guidance on shower care routines, review Lysol’s helpful resource on How to Clean Tile Grout.
Conclusion
Restoring stained, discolored grout doesn’t require a costly, messy tile tear-out. By starting with an effective deep clean—like a hydrogen peroxide and baking soda paste—you lay the groundwork for long-lasting results. Following up with a quality bathroom grout whitener or reviver pen fully restores faded lines, coats structural joints, and shields surfaces against mold and mildew.
Maintaining clean tile facilities across commercial properties in Albuquerque, Rio Rancho, Corrales, and Los Ranchos requires consistency, time, and the right technical approach. At Zia Building Maintenance, our family-owned business has provided high-quality janitorial and tile care services across New Mexico since 1989.
If your facility’s restrooms require expert care, contact Zia Building Maintenance today to learn more about our commercial tile cleaning service and custom janitorial solutions!