
Table of Contents
- What is terminal cleaning in medical rooms?
- How does terminal cleaning differ from routine cleaning?
- When should you schedule a terminal clean?
- How do you perform a terminal clean, step by step?
- How do you choose and apply disinfectants correctly?
- What changes for C. difficile, MDROs, and high-risk pathogens?
- How do you verify and document that a terminal clean was effective?
- Who performs terminal cleaning, and what training do they need?
- What are the most common myths and mistakes in terminal cleaning?
- How long does a terminal clean take, and what does it cost?
- Printable terminal cleaning checklist for facility managers
- Key Takeaways
- Why the weakest link in terminal cleaning is almost never the disinfectant
- Zia Building Maintenance supports your terminal cleaning program
- Useful sources
- FAQ
What is terminal cleaning in medical rooms?
Terminal cleaning is the clinical-grade cleaning and disinfection performed after a patient is discharged or transferred, removing all microbial contamination and resetting the room to a safe, ready state for the next patient. According to CDC guidance, it differs from routine cleaning in both scope and depth, covering every surface in the room, including hard-to-reach areas like mattress undersides, vents, and shelf tops that daily cleaning never touches.
As a facility manager or infection control specialist, your immediate next steps when a room is vacated are straightforward:
- Confirm the room’s status has been flagged in your bed-management system, identify the assigned EVS team member, verify the correct EPA-registered disinfectant and its required contact time for that room type, and schedule an objective monitoring check before the room is cleared for the next patient.
- For isolation or high-risk rooms, notify your Infection Prevention and Control (IPC) team before EVS entry, and apply your facility’s pathogen-specific protocol.
NETEC frames terminal cleaning as an infection-prevention intervention, not a janitorial afterthought. That distinction shapes every staffing, training, and documentation decision you make.
How does terminal cleaning differ from routine cleaning?
Routine cleaning maintains a room while a patient occupies it. Terminal cleaning resets it after they leave. The difference is not just frequency; it is scope, depth, and the clinical stakes attached to every surface touched.
Scope and timing
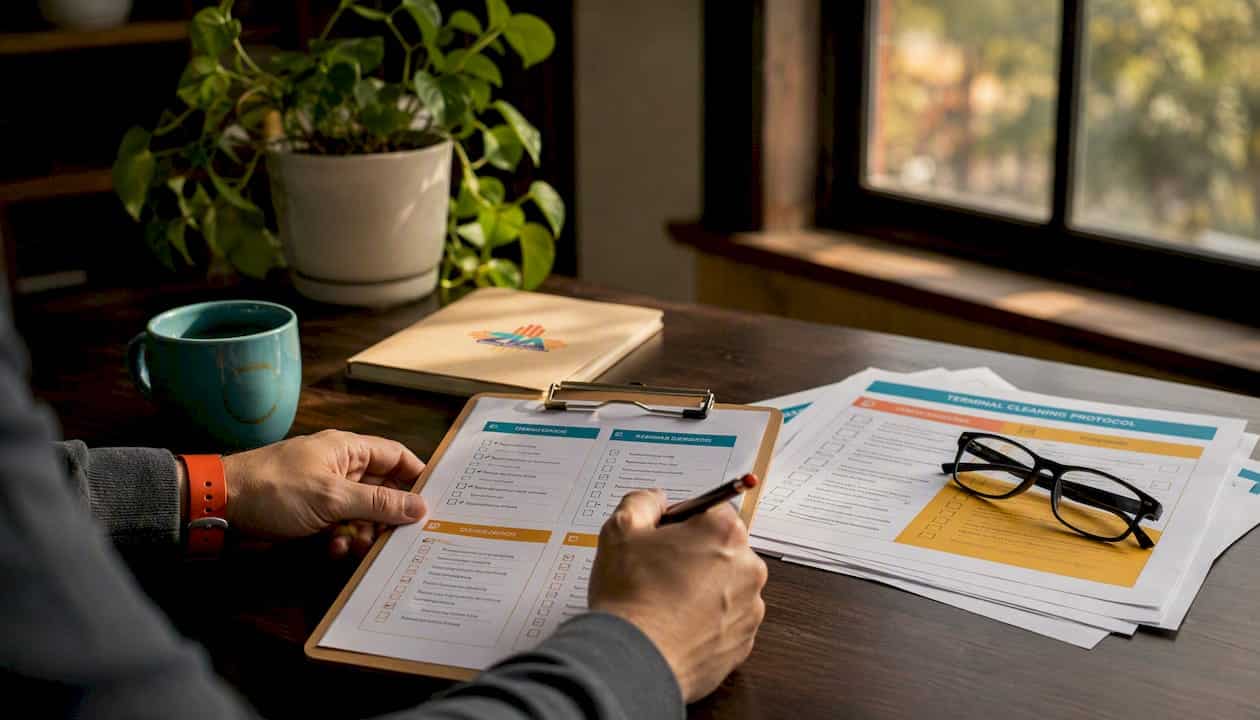
Routine cleaning covers visible surfaces, high-touch points, and floors on a scheduled cycle, typically once daily or more when contamination is visible. Terminal cleaning covers the entire room, including surfaces that are never part of a daily round: mattress covers and frames, IV pole bases, the tops of wall-mounted equipment, ventilation grilles, and the insides of storage cupboards. CDC environmental cleaning procedures specifically require that terminal cleaning include these low-touch and hard-to-reach surfaces, and that periodic scheduled cleaning address ceilings and other areas not reached daily.
Core sequencing principles
Both cleaning types follow the same directional logic, but terminal cleaning applies it with greater rigor:
- Clean to dirty: Start in the least contaminated areas of the room and work toward the patient zone and bathroom.
- High to low: Clean upper surfaces first so any dislodged soil falls onto surfaces not yet cleaned.
- Outside to inside: Move from the room perimeter inward to the patient bed zone last.
Failing to follow this order is one of the most common causes of cross-contamination during a terminal clean, according to CDC rapid learning guidance.
Quick comparison
| Feature | Routine Cleaning | Terminal Cleaning |
|---|---|---|
| Timing | Daily, while patient occupies room | After discharge, transfer, or isolation end |
| Surface coverage | High-touch and visible surfaces | All surfaces, including low-touch and hard-to-reach |
| PPE level | Standard precautions | Room-specific precautions; may require enhanced PPE |
| Disinfectant contact time | Standard product per schedule | Pathogen-specific product and verified contact time |
| Documentation | Basic log | Full session record: staff, product, lot, contact time, monitoring result |
| Time required | typical duration | typically 30–60 minutes per room (standard cases); longer for isolation or outbreak rooms |
The operational implication is real: terminal cleaning requires dedicated staffing time, the right product, and a verification step that routine cleaning does not.
When should you schedule a terminal clean?
The trigger is always a change in room occupancy or infection risk status, not a calendar date. Knowing which rooms to prioritize first prevents gaps during high-census periods or outbreaks.
Standard triggers
- Patient discharge or transfer to another unit or facility
- End of contact, droplet, or airborne isolation precautions
- Confirmed or suspected outbreak rooms (including C. difficile, norovirus, or MRSA clusters)
- Post-procedure rooms in ambulatory surgery or procedure suites
- Any room where a patient with a known multidrug-resistant organism (MDRO) was housed
Prioritization during high census
Not every vacated room carries the same risk. Isolation and outbreak rooms go first, regardless of bed pressure. Urgent discharge rooms where the next patient is already waiting come second. Routine vacated rooms follow. This triage approach protects both patients and staff by ensuring the highest-risk environments receive the most immediate attention.
Turnover pressure is one of the most consistent threats to terminal cleaning quality. When bed demand is high, EVS teams face pressure to cut time, and the steps most likely to be skipped are disinfectant contact time and objective verification. Building a minimum time standard into your SLA, and holding to it even during peak census, is the single most protective scheduling decision a facility manager can make.
Practical note: Isolation rooms cleaned under outbreak conditions often require coordination with nursing isolation precautions protocols before EVS entry. Confirming the clinical handoff is complete before the cleaning team enters prevents both safety gaps and rework.
How do you perform a terminal clean, step by step?
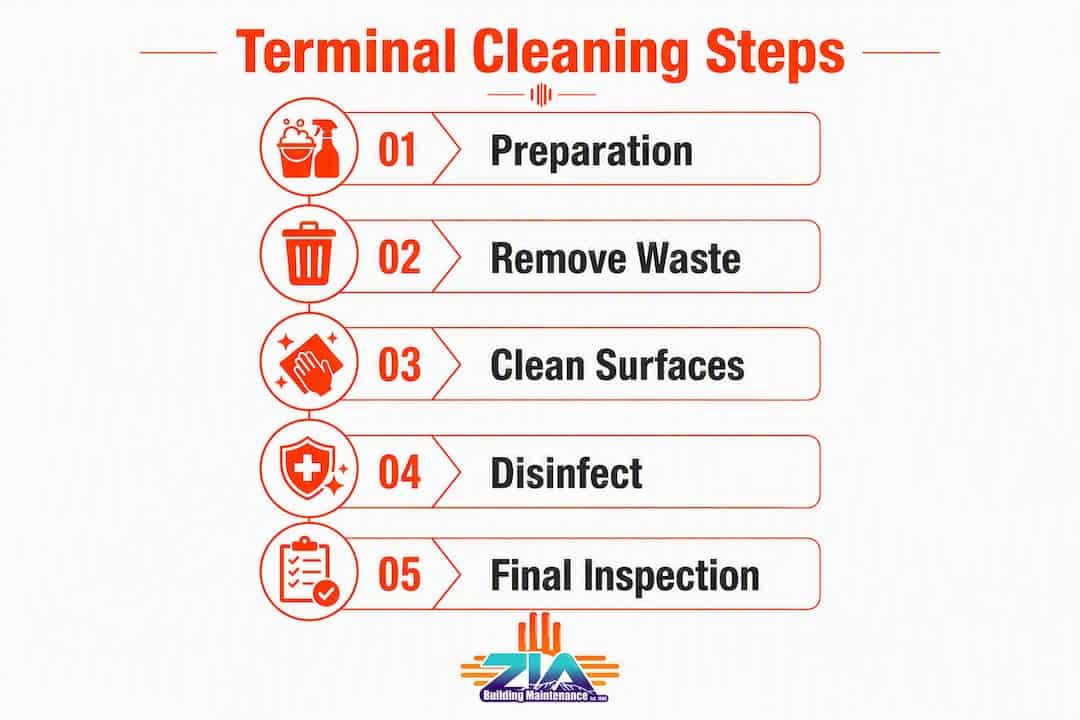
A reproducible protocol reduces variation and protects patients. The sequence below reflects CDC environmental cleaning procedures and is organized into four phases your team can adapt into a local SOP.
Phase 1: Pre-entry preparation
- Confirm the room status change in the bed-management system and verify the correct protocol for the room type (standard, isolation, outbreak).
- Don appropriate PPE: gloves, gown, eye protection, and mask as required by the room’s precaution level.
- Coordinate the clinical handoff: clinical staff remove or flag patient-care items (IV poles, monitors, pumps) they are responsible for cleaning or reprocessing.
- Remove all patient personal items, loose equipment, and extraneous supplies from the room before cleaning begins. Preparing the room before EVS entry reduces cleaning time and improves thoroughness.
- Bag and remove all linen, waste, and sharps per your facility’s waste-handling protocols.
Phase 2: Cleaning sequence
- Begin at the room’s outer perimeter, working inward toward the patient zone. Start high and move low.
- Remove gross soil from all surfaces before applying disinfectant. Disinfectants do not penetrate organic matter effectively; skipping this step is one of the most common failures in terminal cleaning programs.
- Use a fresh, color-coded microfiber cloth for each distinct zone. Operational guides are explicit: never double-dip a cloth into the cleaning solution after it has contacted a surface, and never reuse a cloth across zones.
- Clean all surfaces in the patient zone: bed frame, rails, controls, tray table, call button, IV pole, bedside table, and chair.
- Clean the bathroom last: toilet, sink, faucet handles, handrails, light switch, and door hardware.
Pro Tip: Assign a separate set of color-coded cloths to the bathroom and enforce a strict no-cross-zone rule. A red cloth for the bathroom, blue for the patient zone, and green for the outer room is a simple system that EVS teams can follow consistently without supervision.
Phase 3: Disinfection sequence
- Apply your selected EPA-registered disinfectant to all cleaned surfaces, starting again at the outer room and working inward.
- Verify contact time: the surface must remain visibly wet for the full manufacturer-required dwell time. Do not wipe surfaces dry before that time has elapsed.
- Pay particular attention to high-touch surfaces: bed rails, call buttons, tray tables, IV pole grab areas, light switches, door handles, and bathroom fixtures. A focused resource on high-touch areas often missed can help EVS teams avoid common gaps.
- For isolation or outbreak rooms, apply the pathogen-specific protocol (see Section 6).
Phase 4: Finalization
- Complete floor care: damp-mop or machine-clean per your floor-type protocol, working from the far corner toward the door.
- Restock supplies: gloves, soap, paper products, and any patient-care consumables per your facility’s par levels.
- Conduct visual inspection, then objective verification (fluorescent marker check or ATP reading) before clearing the room.
- Change the room status to “ready” in the bed-management system and complete the cleaning log.
How do you choose and apply disinfectants correctly?
Product selection is not a preference decision; it is a clinical one. The wrong product, or the right product applied incorrectly, leaves patients at risk even when the room looks clean.
Selection criteria
- EPA registration: — The product must appear on the EPA’s List N or the relevant EPA-registered disinfectants list for your target organisms. Registration confirms the product has demonstrated efficacy under controlled conditions.
Reading the EPA label
The manufacturer’s contact time is not a suggestion. It is the minimum time the surface must remain wet with the disinfectant for the product to achieve its registered kill claim. Wiping a surface dry at 30 seconds when the label requires 3 minutes means the room has been cleaned but not disinfected. This is the most common and most consequential misuse of an otherwise effective product.
Common active ingredients and when to use them
EPA-registered disinfectants fall into several categories, each with specific strengths:
- Quaternary ammonium compounds (quats): Effective against most bacteria and enveloped viruses; not sporicidal. Appropriate for standard patient rooms without C. difficile history.
- Sodium hypochlorite (bleach): Sporicidal at appropriate concentrations; required for C. difficile rooms. Can damage surfaces with repeated use; requires careful dilution per label.
- Accelerated hydrogen peroxide: Broad-spectrum efficacy, shorter contact times, and good material compatibility. Useful for high-turnover environments.
- Peracetic acid formulations: Strong sporicidal activity; typically used in specialized settings with appropriate ventilation controls.
Always follow the manufacturer’s dilution instructions. A stronger concentration does not mean faster or better kill; it often means surface damage and increased staff exposure.
What changes for C. difficile, MDROs, and high-risk pathogens?
Standard disinfection protocols are not sufficient for every pathogen. C. difficile spores, in particular, require a fundamentally different approach.
C. difficile: the two-step requirement
C. difficile produces spores that are resistant to most standard disinfectants, including quats. The CDC-recommended protocol requires two distinct steps:
- Step 1: Thorough physical cleaning to remove organic matter and reduce the spore burden on surfaces.
- Step 2: Application of a sporicidal agent (typically a sodium hypochlorite solution at the concentration specified on the label) with full contact time observed.
Skipping or combining these steps leaves viable spores on surfaces. The cleaning step is not optional, even when the room appears visually clean.
MDROs and viral pathogens
For MRSA, VRE, and other MDROs, confirm that your selected disinfectant carries a label claim for those organisms. Dwell time and cleaning thoroughness matter as much as product selection. Viral pathogens like norovirus require products with specific antiviral label claims; not all EPA-registered disinfectants cover non-enveloped viruses.
Adjunct technologies: UV-C and hydrogen peroxide vapor
| Technology | Mechanism | Best Use Case | Limitations |
|---|---|---|---|
| UV-C irradiation | Damages microbial DNA | Supplement after manual clean in high-risk rooms | Requires line-of-sight; shadows create gaps; extends room downtime |
| Hydrogen peroxide vapor (HPV) | Oxidative kill across all surfaces | Outbreak rooms, C. difficile, MDROs | Requires room sealing; longer cycle time; specialized equipment and safety controls |
NETEC guidance is clear: UV-C and HPV reduce bioburden as adjuncts but do not replace manual cleaning and disinfection. A room that has not been manually cleaned first will not be adequately disinfected by UV-C alone, because organic matter blocks the UV light. Both technologies extend room downtime and require staff safety protocols, so their use should be targeted to rooms where the infection risk justifies the additional time and cost.
For infection control management in high-risk scenarios, integrating adjunct technologies into a written protocol, rather than deploying them ad hoc, produces more consistent results.
How do you verify and document that a terminal clean was effective?
Visual inspection alone cannot confirm microbiological safety. Objective monitoring methods give you data you can act on.
Monitoring methods compared
| Method | How it works | Strengths | Limitations |
|---|---|---|---|
| Fluorescent gel markers | Applied to surfaces before cleaning; checked with UV light after | Low cost; immediate feedback; good for training | Does not measure microbial load; only confirms surface was wiped |
| ATP bioluminescence | Measures adenosine triphosphate (organic residue) on a surface | Quantitative; rapid results; tracks trends over time | Does not distinguish viable pathogens from organic debris |
| Targeted cultures | Microbiological sampling of specific surfaces | Confirms actual pathogen presence or absence | Slow results; higher cost; not practical for routine use |
CDC guidance on evaluating environmental cleaning recommends using objective monitoring tools and applying results for supervisory coaching and program-level reporting. Fluorescent markers work well for training new staff and identifying technique gaps. ATP meters are better suited for ongoing trend monitoring across a unit or facility.
Audit cadence and documentation fields
A practical audit program samples a defined percentage of terminal-cleaned rooms each month, with higher frequency during outbreak periods or after monitoring failures. Each cleaning session record should capture:
- Date and time of cleaning
- Room number and unit
- Session type (standard terminal, isolation terminal, outbreak)
- Staff name or initials
- Product used, lot number, and contact time applied
- Monitoring method used and result
- Supervisor sign-off
Documenting session type and staff identity helps identify trends and program-level gaps, and supports reporting to IPC and administration for corrective action.
Pro Tip: When monitoring results show a persistent gap on a specific surface or room zone, tie the corrective action directly to a training session on that surface. Sharing trend data with IPC and facility leadership accelerates identification of systemic barriers, whether workload, room design, or supply gaps, and gets resources allocated faster.
Who performs terminal cleaning, and what training do they need?
Clear role definition prevents the “grey areas” where equipment goes uncleaned because both clinical and EVS staff assumed the other handled it. NETEC guidance identifies this ambiguity as a persistent source of missed cleaning and pathogen reservoirs.
Role responsibilities
| Role | Primary Responsibilities |
|---|---|
| EVS staff | Full room terminal clean: surfaces, floors, bathroom, restocking |
| Clinical staff | Patient-care items (IV pumps, monitors, infusion equipment); initial handoff and room prep |
| EVS supervisor | Assign rooms, verify protocol compliance, conduct or coordinate monitoring |
| IPC team | Set protocols, review monitoring data, investigate failures, advise on pathogen-specific requirements |
Core competencies for EVS staff
Every EVS team member performing terminal cleaning should demonstrate:
- Correct donning and doffing of required PPE without self-contamination
- Sequencing: clean-to-dirty, high-to-low, room perimeter to patient zone
- Product selection, dilution, and contact time for each room type in their facility
- Cloth management: color-coding, no double-dipping, zone discipline
- Waste and sharps handling per OSHA and facility protocols
- Completion of the cleaning log and monitoring documentation
Training frequency and documentation
Initial competency training before independent room assignment, with annual refresher training at minimum, is the standard expectation for accreditation purposes. Facilities with high staff turnover or frequent monitoring failures benefit from quarterly competency checks. All training records, including the date, content covered, and staff signature, should be retained for accreditation review.
Healthcare janitorial training requirements have become more specific in recent years, with accrediting bodies expecting documented competency, not just attendance records. The role of staff training in commercial cleaning extends directly to EVS programs: consistent technique comes from consistent training, not from assuming experienced staff remember their initial orientation.
What are the most common myths and mistakes in terminal cleaning?
Correcting these misconceptions protects patients and prevents the kind of monitoring failures that draw IPC and accreditation scrutiny.
Myths vs. facts
- Myth: If the room smells clean, it is clean. Fragrance is not a disinfection indicator. A room can smell fresh and still carry viable pathogens on surfaces that were wiped but not disinfected at the correct contact time.
- Myth: EPA registration means the product works no matter how you apply it. Registration confirms efficacy under controlled label conditions. Incorrect dilution, insufficient contact time, or application to a surface with organic soil present all reduce or eliminate that efficacy.
- Myth: Visual cleanliness equals microbiological safety. Studies using fluorescent markers consistently show that visually clean surfaces are missed during cleaning more often than staff or supervisors expect.
- Myth: A stronger disinfectant concentration is more effective. Exceeding the label concentration does not improve kill rates and often damages surfaces or increases staff exposure.
Operational pitfalls
The two most common technique failures in terminal cleaning are not using the wrong product — they are using the right product for the wrong amount of time, and spreading contamination by reusing cloths across zones. Both are training and supervision problems, not supply problems.
Specific pitfalls to address in your program:
- Double-dipping: Returning a used cloth to the cleaning solution contaminates the entire bucket. Use a fresh cloth for each surface zone and discard after use.
- Skipping the cleaning step: Applying disinfectant to a surface with organic soil present is one of the most consequential shortcuts in terminal cleaning. The disinfectant cannot penetrate the soil layer.
- Poor clinical-EVS handoffs: When it is unclear who cleans the IV pole or the patient monitor, neither team cleans it. A written handoff checklist eliminates this gap.
- Incorrect product for the room type: Using a quat-based product in a confirmed C. difficile room is a protocol failure, regardless of how thoroughly the room was cleaned.
- Incomplete documentation: A cleaning log with missing contact times or no monitoring result is not a defensible record for accreditation purposes.
Reviewing commonly missed areas in disinfection routines is a practical starting point for identifying where your current program has gaps.
How long does a terminal clean take, and what does it cost?
Time and cost are the two variables facility managers most often need to defend to administration. Having realistic benchmarks makes that conversation straightforward.
Typical time ranges
Terminal cleaning typically takes a moderate amount of time per room, varying significantly based on room size, infection risk level, and protocol complexity. Isolation rooms, outbreak rooms, and rooms requiring adjunct technologies often require additional time. A standard medical-surgical room with no special precautions generally requires less time than an ICU or a C. difficile isolation room.
Scheduling note: Building a minimum time standard into your EVS SLA, and protecting that time even during high-census periods, is the most direct way to prevent quality shortcuts. A room turned over in 20 minutes when the protocol requires 45 is not a win; it is a liability.
Cost drivers
- Labor: The largest cost component. Longer protocols, higher-acuity rooms, and dedicated isolation teams all increase labor hours per room.
- Disinfectant and product type: Sporicidal agents and specialty formulations cost more per application than standard quats. Adjunct technology (UV-C equipment, HPV systems) adds capital and operational cost.
- Monitoring programs: ATP meters, fluorescent marker kits, and audit labor add cost but generate the data needed to justify staffing and product investments.
- Training: Initial and ongoing competency training requires time and materials. Facilities that underinvest in training typically spend more on remediation after monitoring failures.
- Room complexity: Rooms with more equipment, more surfaces, or specialized flooring take longer and cost more per clean.
Scheduling tips
- Stagger terminal cleaning assignments so EVS staff are not competing for the same supply cart or bathroom access point simultaneously.
- Pre-clean preparation by clinical staff (removing equipment, bagging linen) reduces EVS time in the room and improves thoroughness.
- Assign dedicated isolation-room teams during outbreak periods to prevent cross-contamination between high-risk and standard rooms.
Printable terminal cleaning checklist for facility managers
This checklist is organized by phase and includes the documentation fields needed for a defensible cleaning record. Copy it into your checklist system or print it for floor use.
Phase-by-phase checklist
Pre-entry
- [ ] Room status confirmed as vacated in bed-management system
- [ ] Protocol confirmed (standard / isolation / outbreak)
- [ ] PPE donned correctly (gloves, gown, eye protection, mask as required)
- [ ] Clinical handoff complete; patient-care items flagged or removed
- [ ] Linen bagged and removed
- [ ] Waste and sharps removed per facility protocol
- [ ] Extraneous equipment removed from room
Cleaning
- [ ] Gross soil removed from all surfaces before disinfectant application
- [ ] Cleaning sequence followed: high-to-low, clean-to-dirty, outer room to patient zone
- [ ] Fresh color-coded cloth used per zone (no double-dipping)
- [ ] Patient zone surfaces cleaned: bed frame, rails, controls, tray table, call button, IV pole, bedside table, chair
- [ ] Bathroom cleaned last: toilet, sink, faucet, handrails, light switch, door hardware
- [ ] Hard-to-reach surfaces included: mattress underside, vent covers, shelf tops, inside cupboards
Disinfection
- [ ] EPA-registered product confirmed for room type and target organisms
- [ ] Product applied per label dilution
- [ ] Contact time observed (surface remained wet for full dwell time)
- [ ] High-touch surfaces re-confirmed: bed rails, call button, tray table, IV pole grab area, light switches, door handles, bathroom fixtures
Finalization
- [ ] Floor care completed (damp-mop or machine-clean, far corner to door)
- [ ] Supplies restocked (gloves, soap, paper products)
- [ ] Visual inspection passed
- [ ] Objective monitoring completed (fluorescent marker / ATP)
- [ ] Room status changed to “ready” in bed-management system
Documentation fields
| Field | Entry |
|---|---|
| Session type | Standard / Isolation / Outbreak |
| Monitoring method | Fluorescent marker / ATP / Visual only |
| Monitoring result | Pass / Fail / Score |
Completed logs should be retained in a centralized location accessible to IPC and administration. The CDC Environmental Checklist for Monitoring Terminal Cleaning provides an additional reference format for high-touch surface auditing that complements this operational log.
For a broader look at medical office cleaning procedures and how checklists integrate into daily operations, Zia Building Maintenance’s operational guides offer practical templates adapted for clinical environments.
Key Takeaways
Terminal cleaning is a clinical-grade, evidence-based process that requires correct sequencing, EPA-registered disinfectants applied at manufacturer contact time, objective monitoring, and documented staff competency to protect patients and meet accreditation standards.
| Point | Details |
|---|---|
| Definition and purpose | Terminal cleaning resets a vacated room through full-scope cleaning and disinfection, covering all surfaces including hard-to-reach areas. |
| Sequencing rule | Always work clean-to-dirty and high-to-low; reusing cloths across zones is a leading cause of cross-contamination. |
| Contact time is non-negotiable | The surface must remain wet for the full manufacturer-required dwell time; wiping early negates the disinfectant’s registered kill claim. |
| Objective monitoring | Use fluorescent markers or ATP bioluminescence to verify cleaning effectiveness; visual inspection alone is not sufficient. |
| Documentation and training | Log every session with staff identity, product, contact time, and monitoring result; retain records for accreditation review. |
| Zia Building Maintenance | Zia Building Maintenance provides trained EVS teams, documented checklists, and monitoring programs for medical facilities in Albuquerque. |
Why the weakest link in terminal cleaning is almost never the disinfectant
The conversation in most facilities centers on product selection: which disinfectant, which concentration, which contact time. Those questions matter, but they are not where most terminal cleaning programs fail. The failure point is almost always technique.
A room cleaned by a well-trained EVS team using a standard quat-based product, applied correctly and left to dwell for the full contact time, is safer than a room cleaned by an undertrained team using a premium sporicidal agent wiped off at 45 seconds. The product cannot compensate for a missed surface, a reused cloth, or a skipped cleaning step. This is what NETEC means when it frames terminal cleaning as an infection-prevention intervention: the clinical outcome depends on execution, not just on what is in the spray bottle.
The other underappreciated reality is the handoff. The grey zone between clinical staff and EVS, specifically who cleans the IV pole, the patient monitor, and the infusion pump, is where pathogens persist longest. Not because anyone is negligent, but because responsibility was never written down clearly. A one-page handoff protocol that assigns specific items to specific roles eliminates that grey zone entirely. It takes 30 minutes to write and prevents months of monitoring failures.
Objective monitoring data, shared regularly with IPC and facility leadership, is the mechanism that makes all of this visible. Facilities that treat monitoring results as coaching data, rather than pass/fail grades, build programs that improve over time. Those that treat monitoring as a compliance checkbox tend to find the same gaps, in the same rooms, year after year.
Zia Building Maintenance supports your terminal cleaning program
Medical facilities in Albuquerque that need consistent, documented terminal cleaning have a reliable partner in Zia Building Maintenance. Since 1989, Zia has delivered professional janitorial and cleaning services tailored to the specific requirements of medical offices and clinical environments, with trained EVS teams, written protocols, and performance monitoring built into every engagement.
Zia’s medical facility services include trained staff who follow documented cleaning sequences, EPA-registered product programs, and objective monitoring support to help your facility meet accreditation expectations. Every contract includes a customized cleaning plan, clear handoff documentation, and reporting that gives your IPC team the data it needs. For facilities that want to strengthen their EVS team’s competency without rebuilding the program from scratch, Zia’s healthcare janitorial training programs provide structured, documented training aligned with current CDC and NETEC guidance.
To discuss your facility’s terminal cleaning needs and request a service estimate, contact Zia Building Maintenance through the office cleaning services page or reach out directly to schedule a consultation.
Useful sources
These primary references support the guidance in this article. Consult them directly for policy language, regulatory requirements, and the most current recommendations.
- CDC Environmental Cleaning Procedures — The foundational CDC reference for terminal and routine cleaning sequences, surface coverage requirements, and pathogen-specific protocols. Use this for SOP development and accreditation documentation.
- CDC Evaluating Environmental Cleaning — Covers objective monitoring methods (fluorescent markers, ATP), audit design, and how to use monitoring data for program improvement. The primary reference for your verification program.
- CDC Environmental Cleaning Rapid Learning Service — Practical operational guidance on sequencing, documentation, and using monitoring data for coaching and trend reporting.
- CDC Environmental Checklist for Monitoring Terminal Cleaning — A ready-to-use audit checklist for high-touch surface monitoring in patient rooms. Useful as a baseline template for your own documentation system.
- CDC Guidelines for Environmental Infection Control in Health-Care Facilities — The comprehensive CDC guideline covering disinfection standards, surface categories, and engineering parameters for specialized care areas.
- EPA Disinfectants for Emerging Viral Pathogens (List Q) — The EPA’s registered disinfectant list for emerging viral pathogens. Use this to confirm product eligibility and label claims for your formulary.
A note on product use: The EPA label is the single-source requirement for disinfectant application. No internal SOP, vendor recommendation, or industry guide overrides the label’s dilution, contact time, or surface compatibility instructions. Retain monitoring logs per your facility’s retention policy and your accrediting body’s requirements.
FAQ
What does terminal cleaning mean in a hospital?
Terminal cleaning is the comprehensive cleaning and disinfection of a patient room after discharge or transfer, covering all surfaces to remove microbial contamination and prepare the room safely for the next patient. It differs from routine cleaning in scope, depth, and the clinical verification required before the room is cleared.
How long does a terminal clean take?
A standard terminal clean typically takes 30–60 minutes per room, with isolation rooms, outbreak rooms, and rooms requiring adjunct technology (UV-C or hydrogen peroxide vapor) often taking longer.
Who performs terminal cleaning in a healthcare facility?
EVS staff perform the full room terminal clean, while clinical staff handle specific patient-care items such as IV pumps and monitors. IPC and EVS supervisors set protocols, conduct monitoring, and review documentation.
Is terminal cleaning expensive?
Cost varies with room complexity, protocol requirements, labor time, and whether adjunct technologies are used. Labor is the largest driver; isolation and outbreak rooms cost more per clean due to longer protocol times and specialized product requirements.
How do you verify a terminal clean was done correctly?
Objective monitoring methods, specifically fluorescent gel markers and ATP bioluminescence testing, are the CDC-recommended standard for verifying terminal cleaning effectiveness. Visual inspection alone is not sufficient to confirm microbiological safety.