

Strip and Wax Floors for a Cleaner, Longer-Lasting Finish
To strip and wax a commercial floor, remove the worn finish with the correct stripper, recover the slurry, rinse until the surface is neutral and dry, then apply several thin coats of modern acrylic floor finish. This process restores shine, protects the tile from scuffs and soil, and can help avoid the higher cost of replacing damaged flooring.
For most facilities, the budget-friendly approach is not stripping more often. It is matching the service to the floor’s condition. A dull but intact finish may only need a scrub and recoat. Yellowing, peeling, trapped dirt, or worn-through traffic lanes usually call for a full reset.
Modern “floor wax” is usually an acrylic polymer finish, not traditional wax. It acts as a sacrificial wear layer: foot traffic damages the finish first, helping preserve the VCT or other compatible floor beneath it. With routine cleaning, entrance matting, and timely recoats, a well-done strip and wax job can often last 12 to 18 months.
I am Ashley Cordova, Vice President of Zia Building Maintenance, a family-owned New Mexico janitorial company serving clients since 1989. My operations background and focus on safety, consistency, and detail guide how we plan strip and wax work with minimal disruption to active facilities.
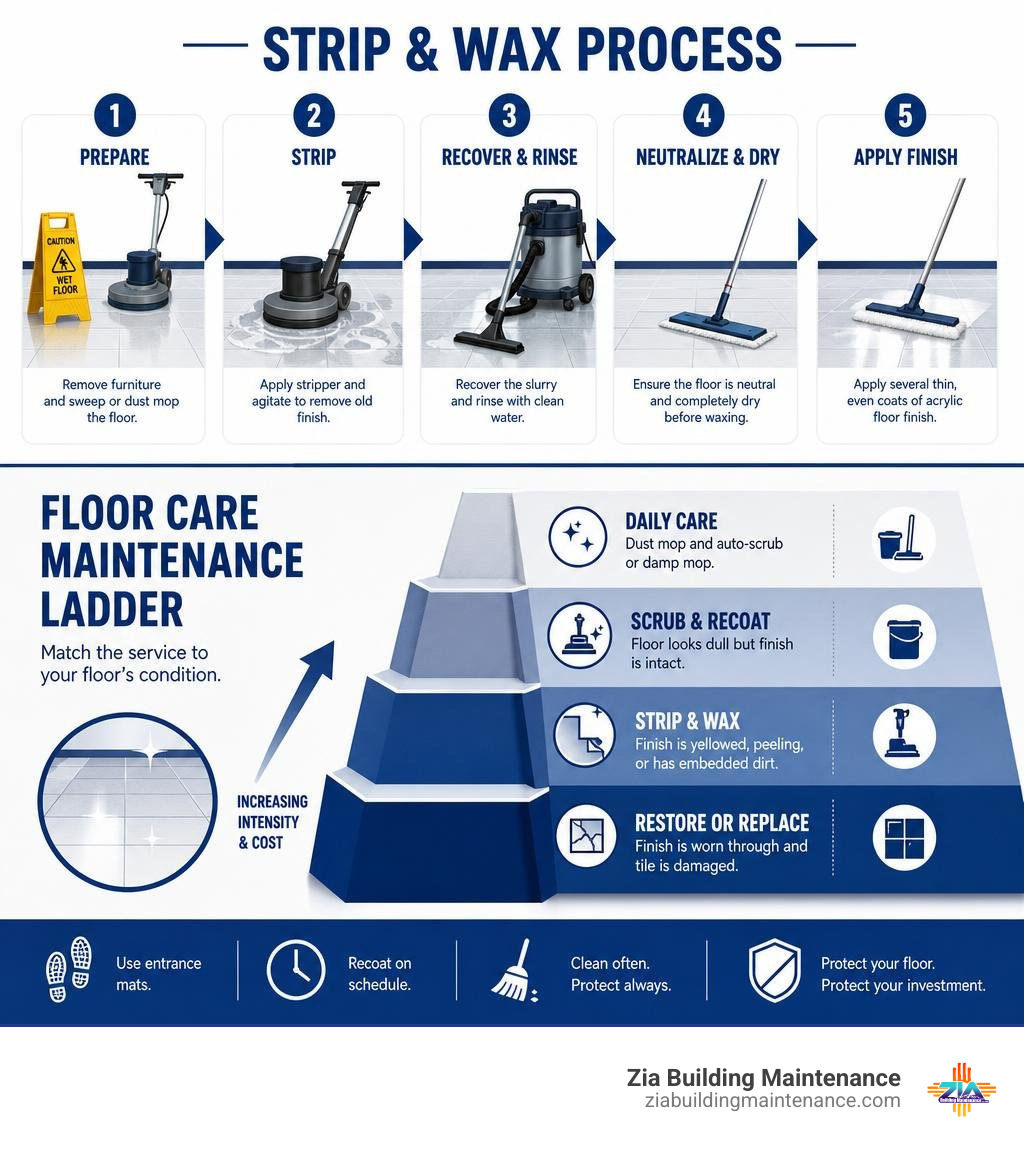
Understanding Floor Stripping, Waxing, and Recoat Economics
Managing a commercial facility means balancing visual standards against a strict operational budget. Floors represent the largest continuous surface in any building, making them the first element visitors and clients notice upon entering. When floor maintenance is neglected, dirt embeds into the protective coating, causing premature failure that requires costly restoration or complete floor replacement.
Applying an acrylic polymer finish creates a protective barrier over porous flooring materials like Vinyl Composition Tile (VCT). As foot traffic, rolling carts, and grit enter the building, friction gradually wears away this clear sacrificial coat rather than abrading the raw tile underneath. Understanding how to manage these acrylic layers directly dictates your long-term maintenance expenditure.
Stripping a floor down to the bare substrate is an intensive, labor-heavy intervention. To maximize your maintenance dollars, facility managers must understand the economic lifecycle of floor finishes: stripping should be treated as a strategic baseline reset, supported by lower-cost maintenance cycles that prolong the life of the acrylic film.
Stripping vs Scrub and Recoat: Knowing When to Reset
One of the easiest ways facility managers overspend is by scheduling a full chemical strip when the floor only requires an interim top-coat refresh. Knowing the visible symptoms of floor wear ensures you choose the right procedure at the right time.
| Floor Condition Symptom | Recommended Service | Process Description | Primary Benefit |
|---|---|---|---|
| Dull surface, light scuffs, intact finish layer | Scrub & Recoat | Top 1–2 layers abraded with a green/blue pad, then recoated | Low downtime, extends life of base coats, 50% lower cost |
| Yellowed edges, ground-in soil, flaking/peeling finish | Full Strip & Wax | Complete chemical dissolution of all finish layers down to bare substrate | Complete aesthetic reset, removes deep-set discoloration |
| Uneven gloss lanes, heavy baseboard wax buildup | Full Strip & Wax | High-productivity stripping, edge detail scraping, multi-coat rebuild | Eliminates unsightly buildup and establishes fresh mechanical bond |
| Loss of mirror gloss after daily neutral cleaning | High-Speed Burnishing | Thermal friction polishing using specialized pad on existing sound finish | Restores optical clarity without applying additional chemical coats |
A scrub and recoat targets only the top layer of finish that has captured surface scratches and everyday grime. By removing the top one to two layers with a heavy-duty neutral cleaner and an abrasive pad, technicians can lay down fresh coats without dissolving the foundation.
However, when you see yellowing along wall baseboards, dark traffic patterns ground beneath several coats of wax, or finish peeling away from the tile substrate, the mechanical bond has failed. At this point, utilizing effective floor cleaning methods requires stripping all accumulated chemistry down to bare tile to begin anew.
Strip and Wax Cost Breakdown: DIY vs Professional Service
Commercial floor stripping and waxing typically costs between $0.50 and $3.00 per square foot. Labor represents 70% to 80% of this total cost due to the intense manual preparation, detail edging, machine scrubbing, extraction, multi-stage rinsing, and incremental coat applications required.
Several variables influence where a project falls within this pricing spectrum:
- Area Size and Layout: Large, open unobstructed layouts (such as school cafeterias or open warehouse walkways) benefit from economies of scale and feature lower per-square-foot rates than partitioned offices with tight cubicles and extensive edge work.
- Old Finish Accumulation: Floors with 15 to 20 coats of aged, oxidized wax require extended dwell times, higher chemical concentrations, and multiple stripping passes, which increases labor hours.
- Number of Applied Finish Coats: Standard commercial applications include 3 to 5 coats. Adding heavy-traffic layers (up to 7 coats) adds approximately $0.10 to $0.25 per square foot per coat for materials and application labor.
- Minimum Trip Charges: Smaller commercial or residential spaces are commonly subject to minimum project mobilization fees ranging from $250 to $500+.
When facility teams attempt in-house stripping without dedicated equipment, the cost of renting rotary machines, wet vacuums, purchasing commercial-grade strippers, and pulling staff away from routine tasks quickly offsets any perceived savings. Partnering with a specialized commercial VCT cleaning service ensures proper slurry containment, avoids tile damage, and aligns with commercial floor care best practices to protect your investment.
Step-by-Step Strip and Wax Execution for Facilities
Executing a professional strip and wax requires strict adherence to chemical dwell times, dilution ratios, and extraction protocols. Skipping a single rinsing step or applying finish over microscopic alkaline residue is the primary cause of floor finish failure across commercial properties.
wp:html
/wp:html
wp:html
/wp:html
Essential Strip and Wax Equipment and Chemical Checklist
Before beginning the process, assemble a complete set of dedicated equipment and personal protective equipment (PPE). Never cross-contaminate tools used for chemical removal with those used to lay finish.
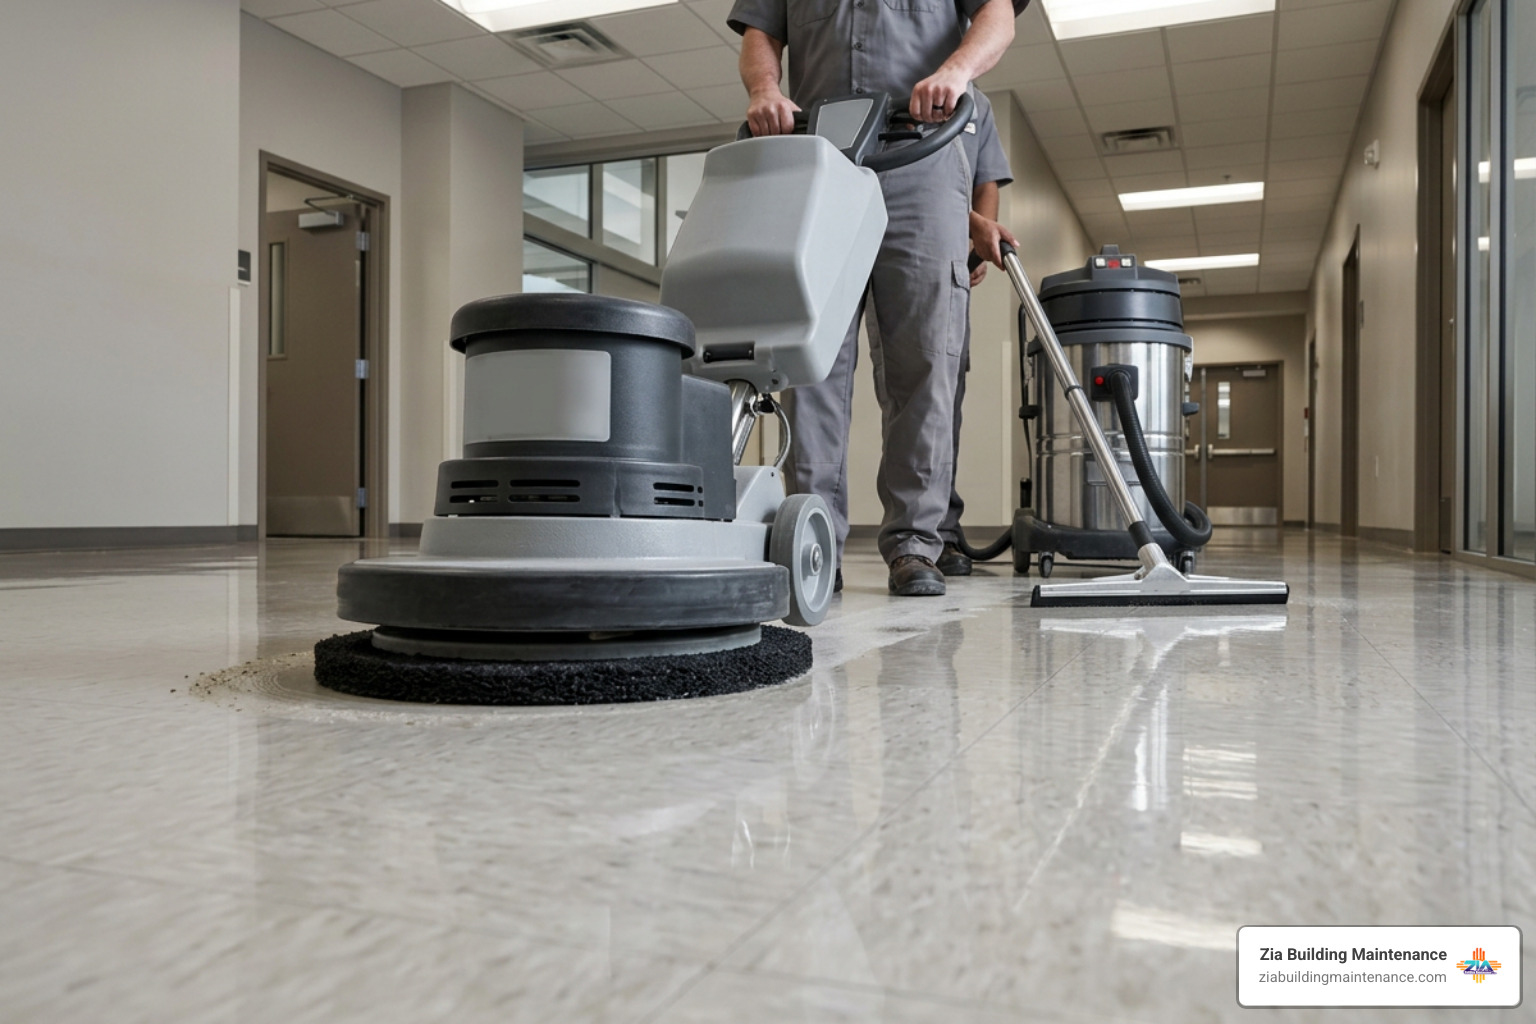
- Machinery & Hardware:
- Low-speed rotary floor machine (175 RPM) equipped with a pad driver or automatic scrubber.
- Commercial wet/dry vacuum with a front-mount squeegee attachment.
- Heavy-duty air movers (axial or centrifugal blowers).
- Coarse black stripping pads (standard and high-productivity open-weave).
- Handheld Doodlebug pad holders and utility stripping pads for baseboards and corners.
- Chemical Supplies:
- Professional-grade cold-water chemical stripper (non-caustic formula).
- Chemical floor neutralizer / conditioning rinse solution.
- High-solids acrylic floor finish (18% to 25%+ solids content).
- Dedicated floor sealer (if working on porous or heavily aged VCT).
- Application & Safety Tools:
- 4 to 5 color-coded mop buckets with wringers (dedicated specifically to stripping solution, clean rinse water, neutralizer, and wax application).
- Heavy-duty trash can liners (used inside finish buckets to prevent cross-contamination).
- Rayon or microfiber lint-free floor finish mop heads and mop handles.
- Standard cotton string mops for stripper application.
- Complete PPE: chemical-resistant nitrile gloves, splash goggles, high-traction stripping boots, and OSHA-compliant “Wet Floor” safety cones.
Chemical Stripping, Slurry Extraction, and Neutralization
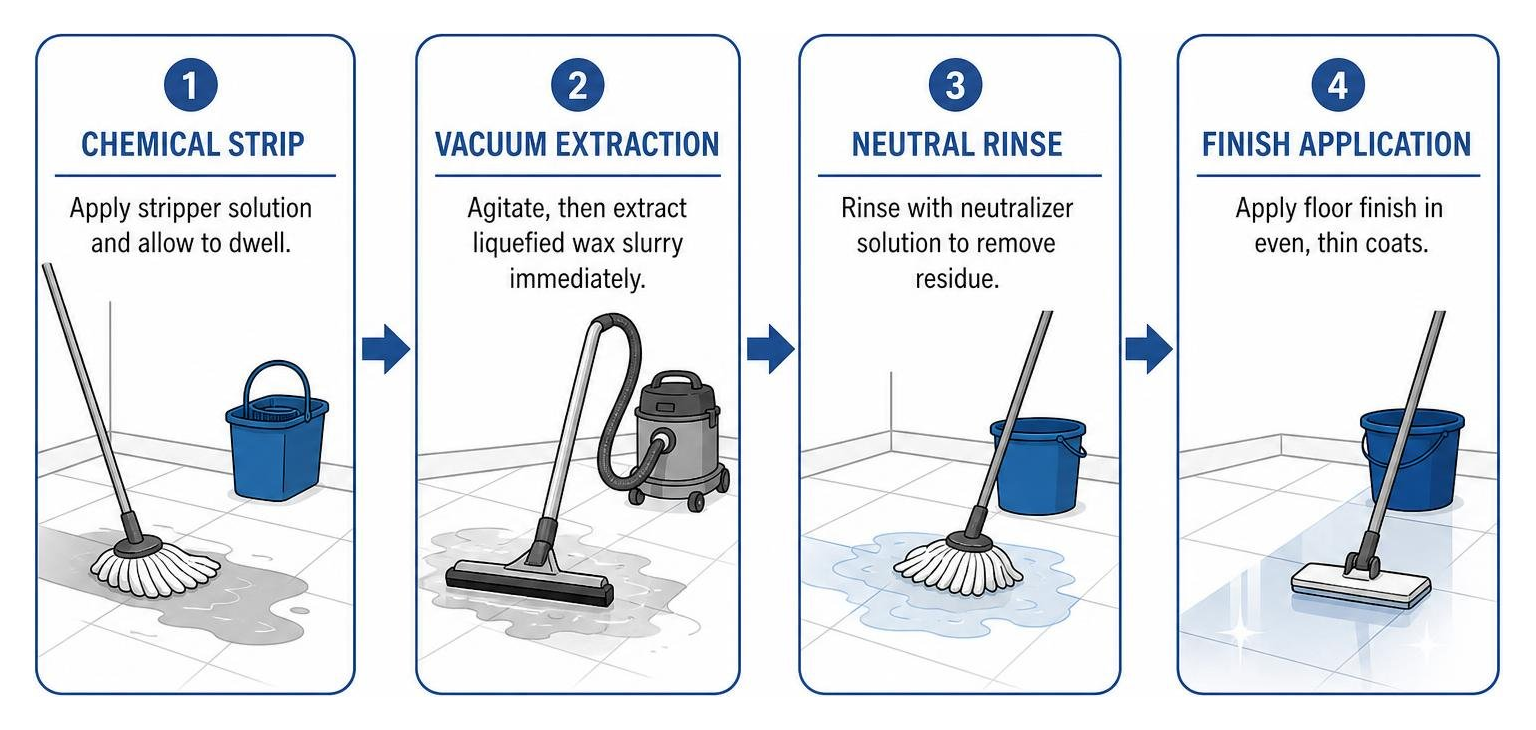
Proper execution follows a systematic workflow. Working in manageable grids of 200 to 400 square feet prevents the chemical solution from drying before extraction.
- Step 1: Room Preparation & Dry Soil Removal: Clear all furniture, mats, and floor fixtures. Dust mop the entire space thoroughly to remove loose sand, hair, and grit. Set up wet floor signs and cordon off the work perimeter.
- Step 2: Mixing and Applying Stripper: Dilute concentrated stripper using cold water according to manufacturer instructions (commonly 1 quart concentrate per 5 gallons of water). Cold water is essential; hot water causes active solvent agents like benzyl alcohol or 2-butoxyethanol to evaporate prematurely, generating harsh fumes and reducing chemical effectiveness. Apply the solution generously with a dedicated cotton mop, completely wetting the 200–400 sq. ft. zone without flooding baseboards.
- Step 3: Controlled Dwell Time: Allow the stripper to dwell undisturbed for 5 to 10 minutes (up to 15 minutes for dense buildup). The solution must soften and liquefy the old polymer layers. Never allow the chemical stripper to dry on the floor; apply a light mist of additional stripper solution if dry spots appear.
- Step 4: Agitation and Detail Edging: While the center area dwells, use a Doodlebug utility pad and hand scraper to scrub along baseboards, door frames, and tight corners. Next, run the low-speed rotary machine fitted with a coarse black stripping pad over the floor in overlapping, slow passes to grind through the dissolved wax matrix.
- Step 5: Immediate Slurry Recovery: Immediately vacuum up the liquefied wax slurry using a wet/dry vacuum with a squeegee wand or an auto-scrubber. Allowing slurry to sit causes liquefied wax to re-harden onto the bare tile pores, creating stubborn stains that require re-stripping.
- Step 6: Neutralization and Double Rinsing: Chemical strippers are highly alkaline (pH 11 to 13). Applying new finish over alkaline residue will cause the fresh acrylic to powder, haze, or fail to adhere. Mop the floor with a clean water solution mixed with a dedicated floor neutralizer (1–2 oz per gallon of clean water). Follow this with a second rinse using pure, clean cold water. Consult a chemical stripping safety guide for detailed handling instructions.
- Step 7: Verification via pH Testing: Press a strip of litmus/pH paper against the damp floor surface. The reading should register between 7.0 and 8.0 (neutral). If the surface tests above pH 8.0, perform an additional clean water rinse.
Applying Acrylic Sealer and Multiple Finish Coats
Once the floor is stripped and neutralized, inspect the dry substrate under raking light. The tile should present an even, dull, completely matte appearance free of shiny patches or dark halos.
- Sealer Base Coat (Optional but Recommended): On older or highly porous VCT, apply 1 to 2 thin coats of dedicated acrylic floor sealer. Sealer features smaller polymer particles designed to penetrate and level deep microscopic voids in the tile, creating an even foundation for the top finish.
- Applying Thin Finish Coats: Line a clean mop bucket with a fresh plastic trash liner to eliminate contamination, and pour in your high-solids acrylic finish. Saturate a dedicated lint-free microfiber or rayon mop head and wring it out so it is fully charged but not dripping.
- The Outline and Fill Technique: Frame the room perimeter about 1 to 2 inches away from the baseboard to prevent wax buildup along the walls. Fill in the center using smooth, continuous “figure-eight” strokes, maintaining a wet edge with a 50% overlap.
- Layering Structure: Apply 3 to 7 thin coats, matching the count to the facility’s traffic requirements. Thin coats dry faster, cure harder, and resist scuffing significantly better than thick, heavy coats. Applying thick coats traps moisture beneath a skinned surface, causing hazing, bubbles, and prolonged tackiness. Following proper procedures for protecting your VCT floor care routine ensures long-term shine.
Total Turnaround Timeline: Drying and Curing Rates
Planning downtime requires distinguishing between simple drying and complete curing.
A standard 1,000-square-foot open area typically requires 4 to 8 hours of active labor for a full strip, neutralization, and multi-coat application by a two-technician team.
- Between-Coat Dry Time: Each coat of finish requires 45 to 60 minutes of drying time under normal ambient conditions (65°F–75°F with 40%–50% relative humidity). Use axial air movers pointed upward toward the ceiling (never directly down at the wet floor, which can blow dust into the wet finish and create ripples).
- Light Foot Traffic Window: Technicians can walk on the floor with clean shoe covers approximately 1 hour after the final coat dries to the touch. The space can typically be opened to light, careful foot traffic after 8 to 12 hours.
- Full Chemical Cure (72 Hours): While acrylic finish feels dry quickly, the cross-linking of polymers continues for 48 to 72 hours. Heavy furniture, heavy rolling pallets, plastic floor mats, and wet damp-mopping should be avoided during this initial 3-day curing window to prevent gouging or trapping moisture.
Floor Type Compatibility: Which Surfaces Can and Cannot Be Waxed?
Applying stripping chemicals and acrylic finishes to incompatible floor materials can permanently ruin expensive architectural finishes. Always verify the floor substrate before applying any chemical stripper.
Compatible Surfaces: VCT, Terrazzo, and Linoleum

- Vinyl Composition Tile (VCT): The standard commercial workhorse. VCT is composed of limestone filler bound with thermoplastic resins. It is porous and relies completely on an external sacrificial acrylic wear layer for stain resistance and shine.
- Poured Terrazzo: True cementitious or epoxy-based terrazzo containing marble or granite chips can be sealed and finished with acrylic coatings, though many modern facilities prefer diamond polishing.
- True Linoleum: Made from natural materials (linseed oil, wood flour, and jute backing). Linoleum requires specialized, low-pH neutral strippers because harsh alkaline chemicals will leach out the linseed oil, causing brittleness and browning.
- Sealed Concrete & Unglazed Quarry Tile: Common in commercial back-of-house areas and warehouses. Porous concrete and quarry tile accept specialized sealers and high-durability acrylic finishes readily when properly prepped. Facility managers can book a comprehensive floor care service to assess their specific commercial substrates.
Incompatible Flooring: LVT, Hardwood, and Glazed Ceramic
- Luxury Vinyl Tile (LVT) & Luxury Vinyl Plank (LVP): Modern LVT/LVP comes from the factory with a durable polyurethane or ceramic-bead top wear layer that is non-porous. Applying traditional floor finish over LVT creates a cloudy, soft film that scuffs easily and cannot adhere properly. Furthermore, harsh chemical strippers can dissolve the core adhesives or cloud the factory finish. Refer to our guide on specialized LVT floor care for proper maintenance protocols.
- Glazed Ceramic & Porcelain Tile: The impervious factory glass glaze prevents acrylic finish from establishing a mechanical bond, leading to peeling and flaking sheets within days.
- Hardwood, Engineered Wood, & Laminate: Chemical stripping solutions and heavy water exposure will penetrate board joints, causing warping, swelling, cupping, and rot. Wood floors require specialized polyurethane, oil finishes, or paste waxes designed strictly for timber.
Common Mistakes That Ruin Floor Finish (and How to Avoid Them)
Even experienced maintenance crews can run into issues if they rush the strip and wax sequence. Here are the most frequent pitfalls and how to avoid them:
- Skipping the Neutralization and Rinse Phase: The number-one cause of floor finish failure. When high-pH alkaline stripper residues remain on the tile, they chemically attack the acrylic polymers of the fresh wax. The result is a chalky, powdery white haze and complete loss of finish adhesion. Always double-rinse and verify with pH strips.
- Letting Stripping Slurry Dry: If the dissolved chemical-wax slurry sits too long, the water evaporates and redeposits liquefied wax deep into the porous tile. This creates dark, sticky blemishes that require a complete, aggressive re-strip. Always work in small grids and extract slurry immediately.
- Applying Coats Too Thickly: Pouring heavy layers of finish in an effort to save time creates “skinning,” where the top of the coat dries while the bottom remains liquid. This traps solvent moisture, resulting in cloudy bubbles, a tacky surface, and finish that easily gouges under foot traffic. Always apply thin, uniform layers.
- Ignoring Baseboards and Edges: Over years of maintenance, mopping finish all the way against baseboard edges creates thick, dark brown ridges of built-up wax that rotary pads cannot reach. Keep finish applications 1 to 2 inches away from walls on the first few coats, and use manual edge scrapers during the strip phase.
- Using Hot Water to Mix Stripper: Hot water accelerates the evaporation of active solvent agents, generating strong fumes and weakening the chemical formula before it can soften the wax. Always mix concentrated strippers with cool or lukewarm water.
- Ignoring Facility Needs with Generic Plans: High-traffic retail storefronts face different wear patterns than low-occupancy storage corridors. Adopting customized commercial floor cleaning approaches prevents premature finish breakdown and optimizes your cleaning budget.
Frequently Asked Questions About Commercial Floor Care
How often should commercial floors undergo a complete strip and wax?
A properly executed strip and wax job typically lasts 12 to 18 months on standard commercial floors before requiring another full chemical strip. High-traffic facilities like public schools, medical clinic corridors, and 24/7 retail centers may need an annual strip-out. Facilities that implement an interim quarterly scrub and recoat program, combined with routine dust mopping and high-speed burnishing, can often extend the time between full strip-outs to 2 to 3 years, significantly reducing annual maintenance costs.
Can you successfully strip and wax floors without a floor machine?
While theoretically possible for small, isolated spaces under 100 square feet (such as a single-stall restroom) using hand-held Doodlebug abrasive pads and scrapers, it is not practical for commercial areas. Stripping without a rotary machine is physically exhausting, requires double the labor time, and often yields uneven finish removal. Mechanical agitation from a 175 RPM buffer is essential to break the chemical bond of multi-layered, aged acrylic finishes across larger commercial floorplans.
How many coats of wax or finish should be applied to high-traffic floors?
On a fully stripped floor, the standard recommendation is 4 to 5 thin coats of commercial acrylic floor finish (or 1 to 2 coats of sealer plus 3 to 4 coats of finish). For high-traffic commercial environments such as educational hallways, main building lobbies, and healthcare facilities, applying 5 to 7 thin coats provides the necessary wear depth to withstand constant foot traffic and aggressive cleaning schedules without wearing down to the raw tile substrate.
Conclusion
Mastering the strip and wax process on a budget is about precision, preventive maintenance, and chemical control. When facilities invest in proper preparation, honor dwell and dry times, and avoid common shortcuts, their commercial floors maintain an inspection-ready shine that withstands relentless daily traffic.
By establishing a balanced floor care schedule—combining daily neutral cleaning, high-speed burnishing, and timely scrub-and-recoat cycles—you can extend the life of your acrylic wear layer and protect your facility’s tile investment for years to come.
If your facility’s floors look dull, yellowed, or scratched, our expert team at Zia Building Maintenance is ready to help. Serving commercial properties across Albuquerque, Rio Rancho, Corrales, and Los Ranchos, we bring over three decades of commercial cleaning expertise to every project. Contact us today to evaluate your floors, or read our complete guide to Revive Your Floors The Essential Guide To Stripping And Waxing for actionable floor care strategies.