

TL;DR:
- A structured, seven-step cleaning process ensures effective surface cleaning and disinfection in commercial facilities. Proper sequence, staff training, and attention to contact time are essential to achieve genuine hygiene and prevent infections. Professional cleaning services tailor methods to facility needs, improving standards through consistent, documented protocols.
Most business managers assume a clean-looking facility is a safe one. That assumption creates real risk. Understanding commercial cleaning methods explained through a professional lens means recognizing that cleaning, sanitizing, and disinfecting are three distinct actions that must happen in the correct sequence to actually protect your staff and clients. This guide breaks down the standardized processes, techniques, and decision frameworks that separate surface-level tidying from genuine infection control — giving you the knowledge to hold your cleaning program to a much higher standard.
Table of Contents
- Key takeaways
- Commercial cleaning methods explained: the 7-step process
- Cleaning, sanitizing, and disinfecting: not the same thing
- Why disinfectant contact time is the most overlooked factor
- Comparing types of commercial cleaning methods
- Building an effective commercial cleaning program
- My take on what actually drives cleaning success
- How professional cleaning services support your facility
- FAQ
Key takeaways
| Point | Details |
|---|---|
| Follow a structured sequence | The 7-step cleaning process reduces errors and improves hygiene outcomes across all facility types. |
| Clean before you disinfect | Dirt and organic matter neutralize disinfectants; skipping pre-cleaning wastes product and leaves pathogens behind. |
| Contact time is non-negotiable | Disinfectants must stay visibly wet on a surface for the full labeled time to kill pathogens effectively. |
| Match the method to the facility | Routine, deep, steam, and green cleaning each serve different needs; using the wrong approach wastes resources. |
| Training and documentation matter | Consistent results require written schedules, staff training, and regular quality inspections. |
Commercial cleaning methods explained: the 7-step process
The industry standard for professional janitorial work is built around a structured, seven-step sequence. This process is not arbitrary. Every step sets up the next one, and skipping a step compromises the entire chain. The 7-step cleaning process reduces cleaning time while improving hygiene outcomes by enforcing two core principles: dry before wet, and clean before disinfect.
Here is how the sequence works in practice:
- Preparation. Gather all supplies, don appropriate personal protective equipment (PPE), and post wet floor signage before touching anything. This protects both your staff and anyone walking through.
- Inspection. Walk the area and identify high-risk zones, heavily soiled spots, or surfaces that need special attention. This step prevents you from discovering a problem after you have already applied product.
- Dry debris removal. Sweep, dust, or vacuum all loose soil, dirt, and debris. Removing dry debris before introducing any liquid is what protects floor scrubbing equipment from premature wear.
- Floor scrubbing or surface washing. Apply detergent to floors and surfaces, scrub thoroughly, and remove soil. At this stage, the goal is cleaning — not disinfecting.
- Sanitizing or disinfecting. Apply the appropriate product to surfaces that require pathogen reduction. This step only works correctly because the previous steps removed the organic matter that would otherwise neutralize the chemical.
- Final inspection. Review the area for missed spots, streaks, or surfaces that still appear soiled. Catching errors at this stage prevents them from becoming recurring problems.
- Completion and signage. Remove equipment, store chemicals properly, and leave wet floor signs in place until surfaces are fully dry.
Pro Tip: Apply disinfectant to high-touch areas like door handles and light switches at the start of step five, then work through the rest of the room. By the time you circle back, the dwell time has elapsed naturally without any waiting.
Formalizing this process with written checklists is what separates consistent results from hit-or-miss outcomes. When any staff member can pick up the checklist and follow it to the same standard, your facility’s hygiene no longer depends on individual habits or memory.
Cleaning, sanitizing, and disinfecting: not the same thing
These three terms are used interchangeably in everyday conversation, but in professional facility management they carry precise, operationally meaningful definitions. Getting them confused leads to the kind of cleaning failures that look fine on the surface and fail at the microbial level.
Here is the distinction that matters most for your decision-making:
- Cleaning uses soap or detergent and physical action to remove dirt, dust, debris, and most surface-level contaminants. It does not kill pathogens, but it does remove them physically and prepare the surface for chemical treatment.
- Sanitizing reduces the number of bacteria on a surface to a safe level as defined by public health standards. It is appropriate for food-contact surfaces and lower-risk environments.
- Disinfecting uses registered chemicals to kill a broader spectrum of pathogens, including viruses and fungi. It is required in healthcare settings, restrooms, and any area with elevated infection risk.
CDC guidance is explicit on this point: cleaning with soap or detergent must happen before you selectively sanitize or disinfect high-risk surfaces. In commercial environments with heavy soil, skipping pre-cleaning leads to poor pathogen kill and wasted product every single time.
Sanitizers and disinfectants vary significantly in food-surface safety. Using the wrong product on a food-contact surface, or failing to rinse when required, creates a health hazard that can trigger regulatory violations. Always read the label and match the product to the surface type.
For a detailed breakdown of how these protocols apply in your specific facility, Ziabuildingmaintenance maintains a thorough guide on cleaning vs. disinfecting differences that covers industry-specific applications.
Why disinfectant contact time is the most overlooked factor
You can follow every other step perfectly and still fail at disinfection. The reason is contact time, also called dwell time. This is the period a disinfectant must remain visibly wet on a surface to achieve the pathogen kill rate listed on the product label.
Contact times vary from approximately 30 seconds to 10 minutes depending on the product and the pathogen being targeted. Most staff members wipe a surface dry in well under a minute, which means the disinfectant never had the opportunity to work. This is not a niche problem. Most disinfecting programs fail because of evaporation and staff wiping surfaces before contact time ends.
The good news is that this failure mode is entirely preventable. Disinfectant effectiveness depends more on technique, coverage, and contact time than on the specific chemical used. Three operational fixes make the biggest difference:
Apply disinfectant in sections, not all at once. If you spray an entire restroom and then immediately start wiping, the first surface you treated may already be dry by the time you return to it. Spray one section, move to a different task in that same space, and then return to wipe.
Choose products with operationally feasible contact times. A product requiring 10 minutes of wet contact time is rarely compatible with a busy commercial facility. Selecting a product with a one to three minute contact time significantly improves compliance without sacrificing efficacy.
Build contact time into your workflow, not your watch. Sequencing cleaning protocols so that staff apply disinfectant first and return to wipe after dwell time is a practical way to maintain compliance without slowing operations.
Pro Tip: Post contact time requirements for each approved product on your supply cart or inside your cleaning closet. Staff should not need to read a label mid-task to know how long to wait.
Comparing types of commercial cleaning methods
Not every facility needs the same approach. Understanding the different methods available — and where each performs best — lets you build a cleaning program that matches your actual risk profile and budget. Below is a comparison of the most common methods used in professional commercial settings.
| Method | Best application | Key strength | Limitation |
|---|---|---|---|
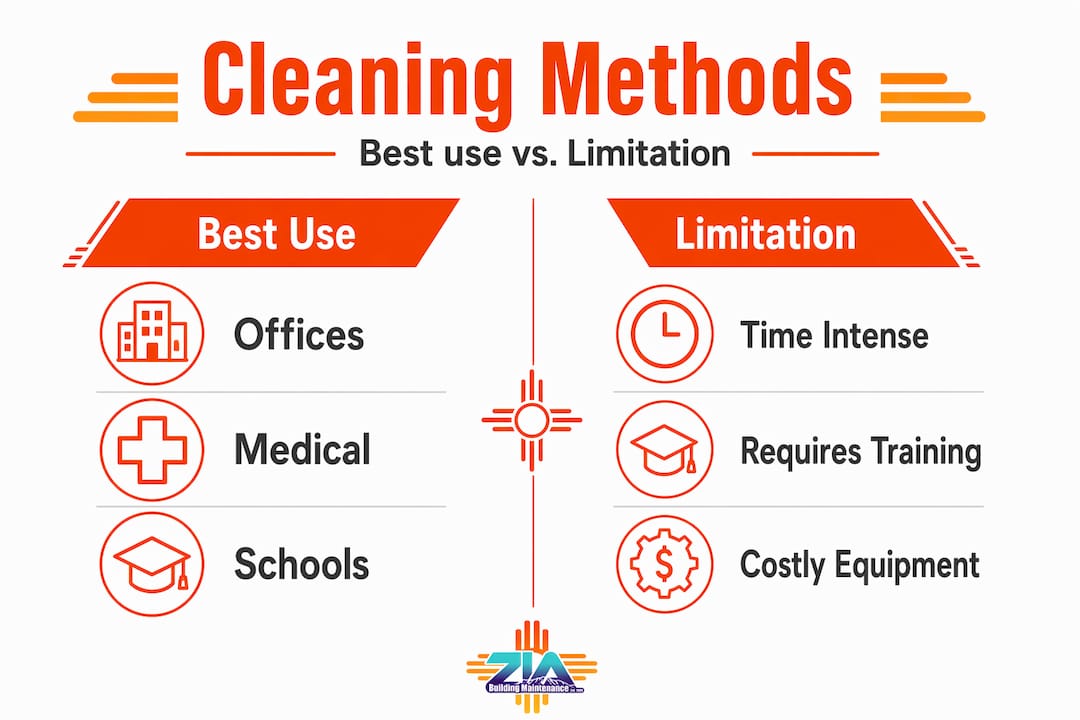
| Routine cleaning | All facilities, daily upkeep | Maintains baseline hygiene consistently | Does not address deep soil or pathogens |
| Deep cleaning | High-traffic areas, periodic reset | Removes embedded soil and buildup | Time-intensive and higher cost |
| Steam cleaning | Healthcare, food service, gyms | Chemical-free pathogen reduction | Requires specialized equipment |
| Green cleaning | Offices, schools, LEED-certified buildings | Reduces chemical exposure for occupants | Some products require longer dwell time |
| Abrasive cleaning | Industrial floors, grout, heavy equipment | Removes stubborn deposits effectively | Can damage delicate surfaces |
| Dry cleaning methods | Carpets, upholstery, electronics-adjacent areas | No moisture risk or drying time | Limited effectiveness on biological contamination |
Routine cleaning frequency should reflect traffic levels, industry standards, and contamination risk. A hospital corridor needs daily disinfection. A small private office may need thorough cleaning two to three times per week. Retail spaces and schools fall somewhere in between, with high-touch areas like door handles, light switches, and bathroom fixtures requiring attention at every cleaning cycle.
Eco-friendly cleaning products reduce chemical exposure while maintaining efficacy across surfaces. More commercial clients now request green cleaning programs both for occupant health reasons and to satisfy sustainability reporting requirements. Offering or requesting a green option is no longer unusual. It is increasingly expected.
For facilities where indoor air quality is a concern alongside surface hygiene, understanding how cleaning product selection affects air quality is worth exploring. Strategies for improving office air quality often tie directly into which cleaning products and methods you are using.
Building an effective commercial cleaning program
A written cleaning program does more than satisfy audits. It creates accountability, reduces staff turnover in cleaning roles, and produces measurable hygiene outcomes that protect your business.
Start with a risk-based schedule. Identify areas by contamination risk and foot traffic, then assign cleaning frequencies accordingly. Restrooms and breakrooms need daily attention at a minimum. Conference rooms used occasionally may only need thorough cleaning twice per week. High-touch areas like door handles, light switches, and shared equipment surfaces deserve specific attention at every visit because they are the primary transmission points in any facility.
Staff training should cover product use, contact times, PPE requirements, and the correct sequence for each task. Documented training reduces errors and gives you a defensible record if a hygiene concern arises. Pair training with regular inspections. A supervisor walkthrough after each cleaning shift catches problems before they become patterns.
Align your cleaning procedures with safety protocols from the start. Wet floor signs, chemical storage requirements, and PPE use are not optional additions. They are part of a professionally managed program. Facilities operating in regulated industries should review OSHA and HIPAA compliance requirements to understand how cleaning procedures intersect with legal obligations.
Pro Tip: Review your cleaning program every six months. Products get discontinued, facilities change, and staff turnover affects consistency. A scheduled review keeps your program current and prevents gaps from compounding over time.
My take on what actually drives cleaning success
I have seen facilities with expensive equipment and premium products produce mediocre hygiene outcomes, and I have seen modest programs deliver consistently clean environments. The difference is almost never the product. It is the sequence, the training, and the follow-through.
In my experience, the most common failure point is the belief that applying a disinfectant is the same as disinfecting. Staff spray, wipe, and move on. The surface looks clean. Nobody questions it. But if the cleaning step was skipped or the dwell time was not observed, you have created the appearance of hygiene without the substance of it. That gap is where facility-acquired infections and compliance violations come from.
What I have found actually works is a shift in how managers frame the cleaning function. When facility hygiene is treated as a documented, inspected process rather than a daily task list, results change immediately. Staff take it more seriously when they know the work is being checked against a written standard. Supervisors catch errors when they have a checklist to reference. And over time, the team builds competence rather than just habit.
My strongest recommendation is this: do not add more products or more cleaning hours until you have confirmed the existing sequence is being followed correctly. You will usually find the problem is execution, not frequency.
— Ashley
How professional cleaning services support your facility
Maintaining a genuinely clean and sanitary facility requires more than goodwill and general purpose spray. It requires trained staff, properly sequenced methods, the right products for each surface, and consistent follow-through on every visit. That is exactly what a professional commercial cleaning service delivers.
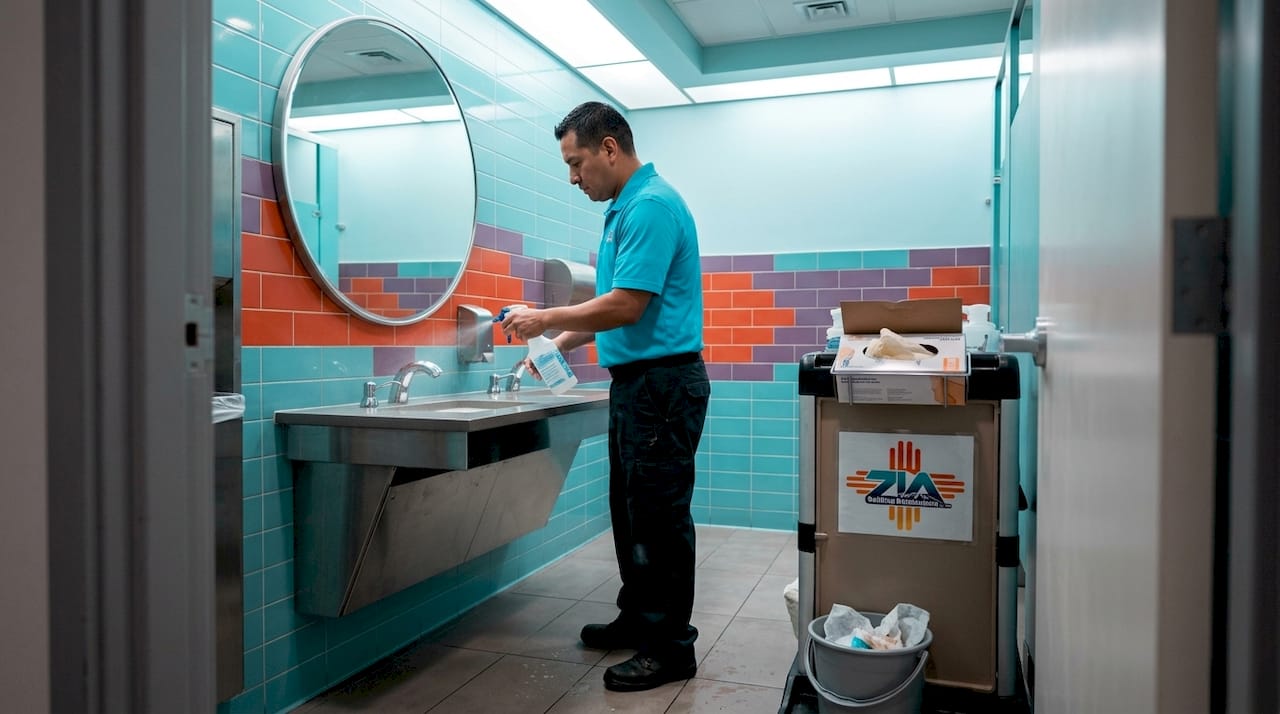
Ziabuildingmaintenance has been serving offices, medical facilities, and schools in Albuquerque since 1989, bringing structured, inspection-based cleaning programs to facilities of every size. Every service plan is customized to the facility’s specific needs, traffic patterns, and compliance requirements. Eco-friendly product options are available, and scheduling is flexible to minimize disruption to your operations.
If you are ready to raise your facility’s hygiene standard, start by exploring professional office cleaning options built for your specific environment. You can also review the cleaning contract checklist to know exactly what to expect from a professional service agreement. Contact Ziabuildingmaintenance today to request an estimate.
FAQ
What is the 7-step commercial cleaning process?
The 7-step process includes preparation, inspection, dry debris removal, floor scrubbing, sanitizing or disinfecting, final inspection, and completion with signage. Following this sequence in order ensures cleaning is done before disinfecting, which maximizes the effectiveness of chemical products.
Why does cleaning before disinfecting matter?
Dirt and organic matter physically block disinfectants from reaching pathogens and reduce their chemical potency. CDC guidance confirms that pre-cleaning with detergent is required before disinfecting for the process to work correctly.
What is disinfectant contact time and why does it matter?
Contact time is how long a disinfectant must remain wet on a surface to kill targeted pathogens. Products vary from 30 seconds to 10 minutes, and wiping a surface dry before that time ends means the disinfectant did not work as labeled.
What are the main types of commercial cleaning methods?
The primary methods include routine cleaning, deep cleaning, steam cleaning, green cleaning, abrasive cleaning, and dry cleaning. Each suits different facility types and contamination risks, and most professional programs combine more than one approach.
How often should a commercial facility be cleaned?
Cleaning frequency depends on traffic levels, industry type, and contamination risk. High-traffic or high-risk areas may require daily service, while lower-risk spaces can be maintained with less frequent deep cleaning visits.