

Shower Caulk Mold Removal Starts With the Right Call
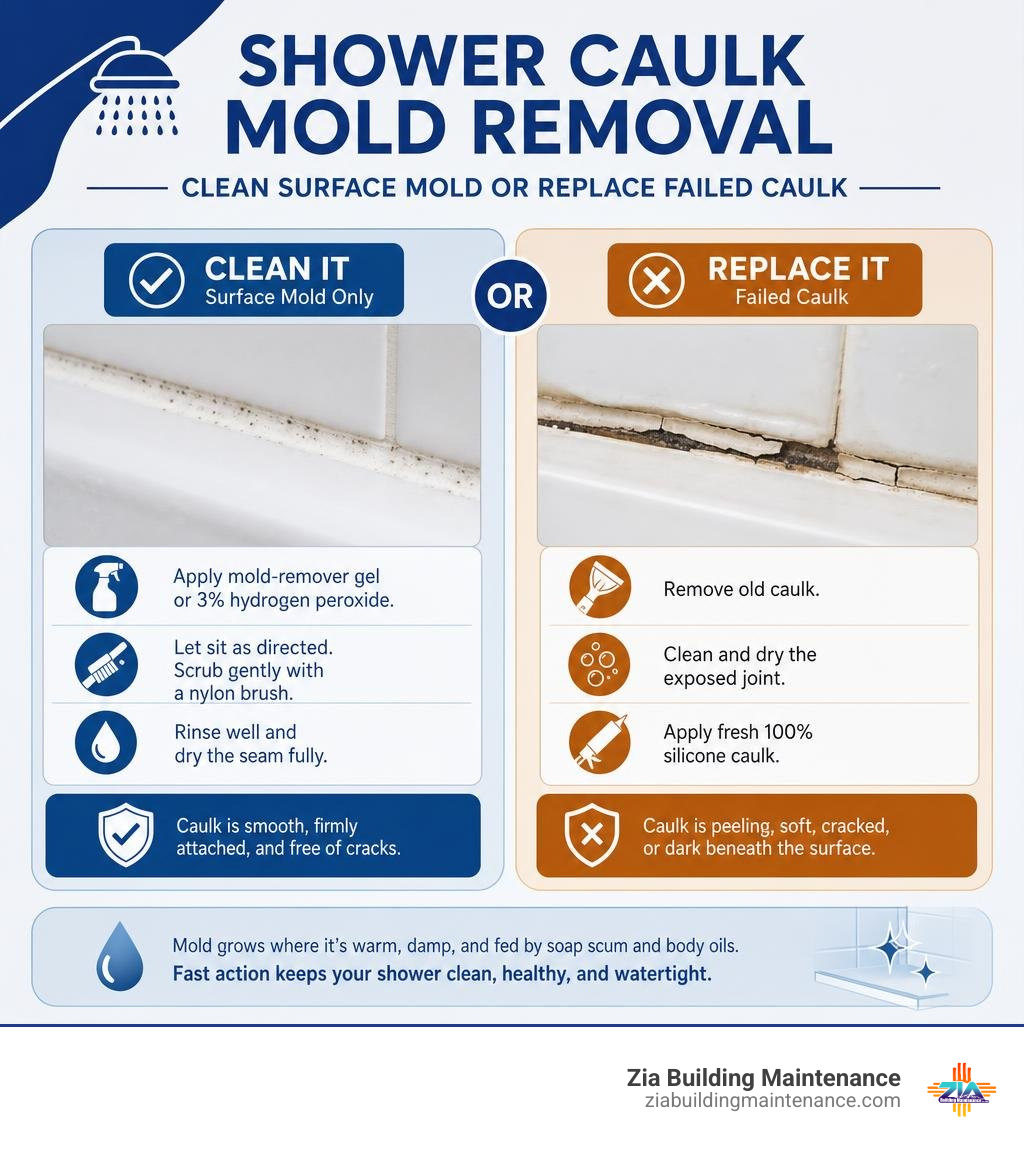
For effective shower caulk mold removal, first check whether the mold is only on the surface. If the caulk is smooth, firmly attached, and free of cracks, treat the stain with a clinging mold-remover gel or 3% hydrogen peroxide, let it sit as directed, scrub gently with a nylon brush, rinse, and dry the seam fully.
If the caulk is peeling, soft, cracked, or dark beneath the surface, cleaning will not restore the seal. Remove it, clean and dry the exposed joint, then apply fresh kitchen-and-bath 100% silicone caulk.
Mold grows here because showers stay warm and damp, while soap scum, body oils, and other residue give it a food source. Fast action matters: a clean, dry, intact caulk line is easier to maintain than a failed seal that traps moisture behind it.
I am Ashley Cordova, Vice President of Zia Building Maintenance, a family-owned New Mexico janitorial company serving clients since 1989. My work in operations and commercial cleaning helps guide practical, detail-focused shower caulk mold removal methods that protect both appearance and facility hygiene.
Key shower caulk mold removal vocabulary:
What Causes Black Mold to Colonize Shower Caulk?
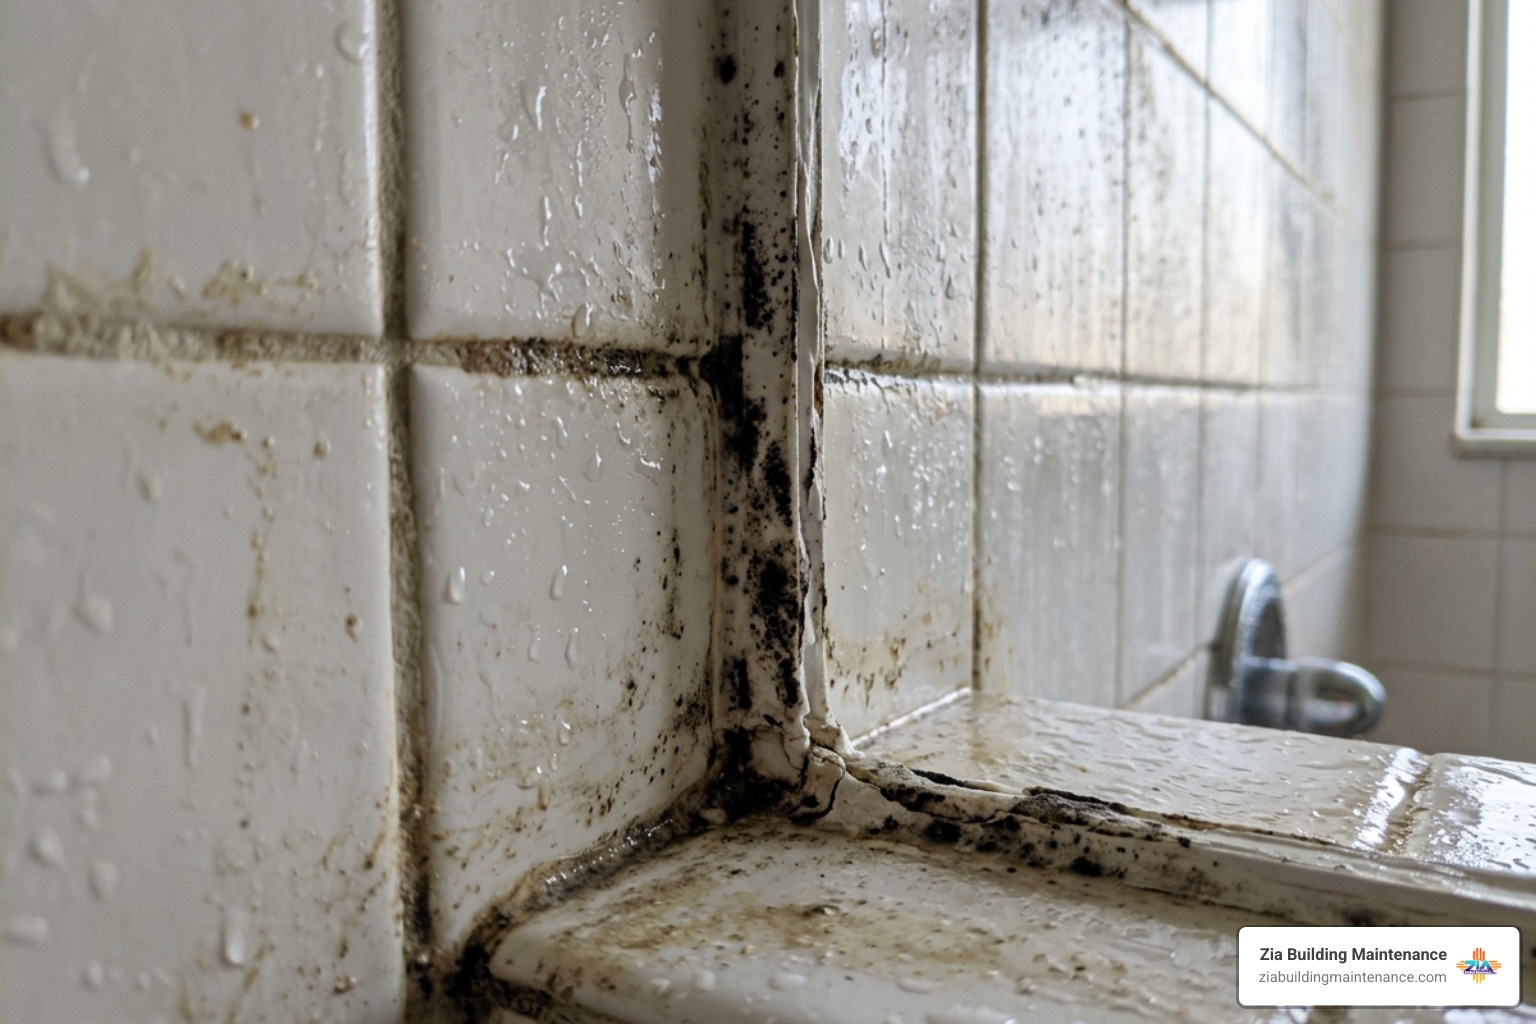
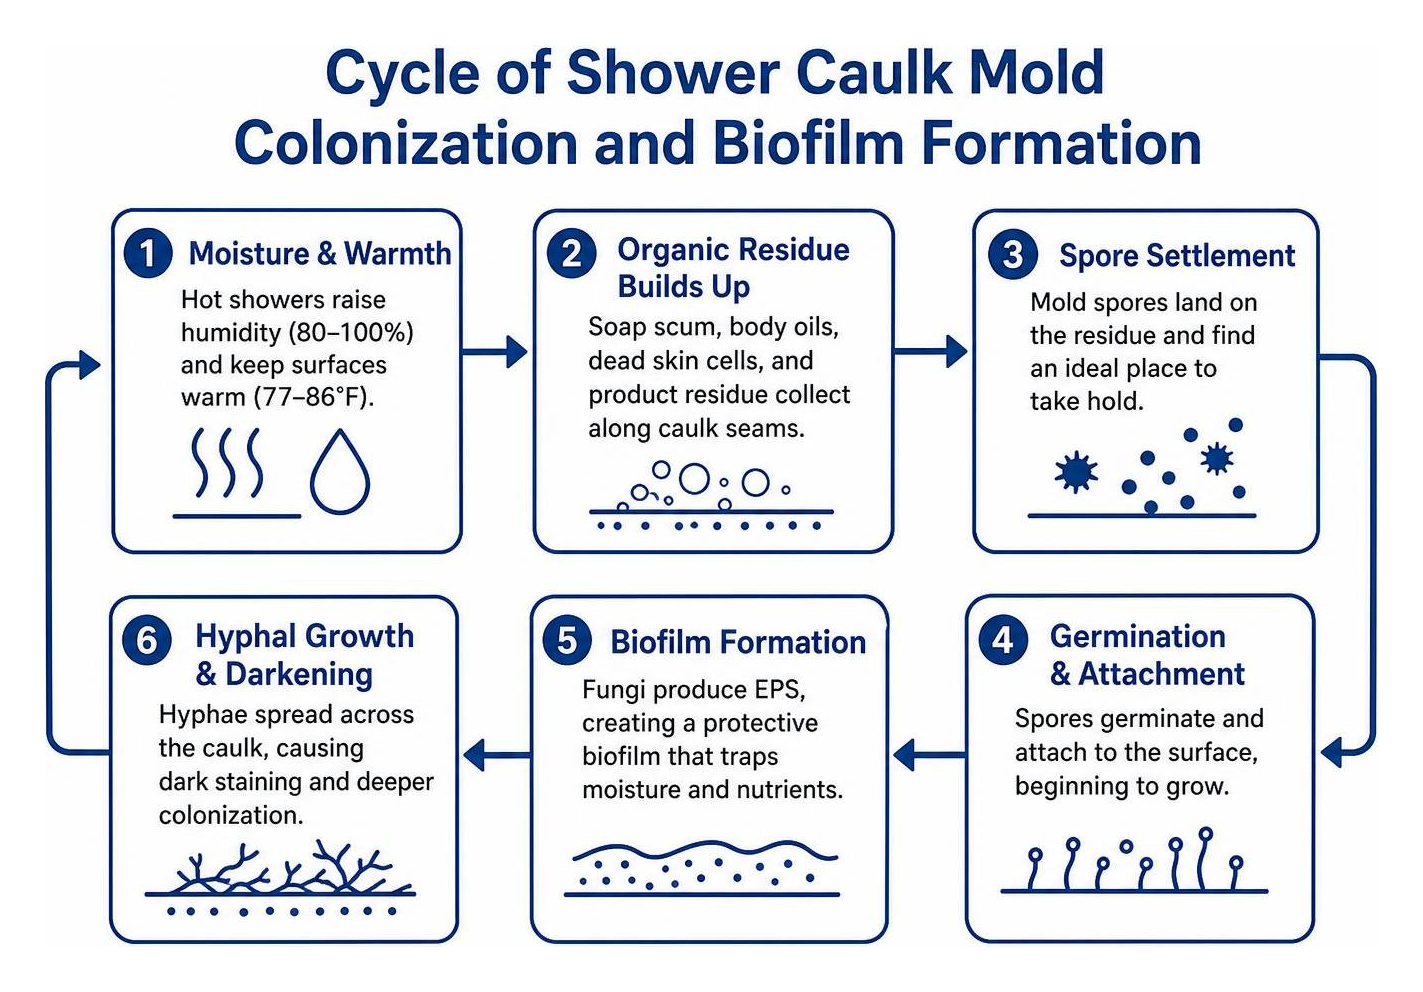
Showers are practically custom-built incubators for fungal growth. Every time someone takes a hot, steamy shower, ambient relative humidity spikes between 80% and 100%. In typical closed bathrooms without commercial-grade exhaust systems, that moisture can linger for 30 to 60 minutes. Because mold spores thrive in warm environments between 77°F and 86°F, your shower perimeter offers ideal conditions for rapid spore germination within 24 to 48 hours.
Moisture alone is only half the equation; mold also requires a continuous food supply. As we bathe, shower surfaces accumulate organic debris:
- Sloughed-off dead skin cells
- Natural body oils and lipids
- Residue from conditioners, shampoos, and bar soaps
- Fatty acids that form stubborn soap scum
This cocktail settles along horizontal seams, particularly where the tub rim meets tiled walls. If your cleaning routine falls into common traps—like the 5 common bathroom cleaning mistakes you can’t afford to make—this organic film builds up rapidly.
Fungal spores settle onto this film, anchoring themselves and producing extracellular polymeric substances (EPS) that create a protective biofilm. Once fungal hyphae branch out across the silicone surface, standard wiping barely scratches the surface, leaving dark spots that make even a freshly sanitized bathroom look neglected.
Proven Methods for Shower Caulk Mold Removal
When tackling caulk mold, your goal is to destroy fungal structures without eroding the siloxane bonds that keep silicone flexible and watertight. Chemical safety and surface compatibility should always guide your choice of cleaning agent.
Before starting any deep cleaning, protect yourself and your space. Spore agitation can release airborne allergens, and concentrated cleaners generate fumes:
- Wear an N95 respirator mask to avoid inhaling mold spores and chemical mist.
- Put on chemical-resistant nitrile gloves and eye protection.
- Open bathroom windows and turn on the exhaust fan to ensure continuous airflow.
- Clear away all shampoo bottles, loofahs, and toys from the shower perimeter.
| Cleaning Agent | Active Mechanism | Typical Dwell Time | Silicone Safety | Surface Compatibility Notes |
|---|---|---|---|---|
| 3% Hydrogen Peroxide | High-redox oxidation (1.78 V) | 15–30 minutes | Excellent (non-degrading) | Safe on grout, tile, acrylic; test colored grout |
| Baking Soda & Bleach Paste | Sodium hypochlorite oxidation | Several hours / overnight | Moderate (can embrittle over time) | Avoid on porous natural stone or colored surfaces |
| Commercial Mold Gel | Clinging hypochlorite / surfactant | 2–8 hours (per label) | Good (when rinsed promptly) | Excellent on vertical caulk lines; avoid metals |
| Diluted White Vinegar | Acetic acid (pH < 2.5) | 15–30 minutes | Poor (accelerates silicone wear) | Never use on marble, travertine, or limestone |
For additional guidance on traditional surface treatments, see How to Remove Mold from Shower Caulking | Family Handyman for practical home maintenance perspectives.
Essential DIY Pastes for Shower Caulk Mold Removal
Vertical and corner caulk seams present a unique challenge: liquid sprays quickly run down the wall into the drain before active ingredients can penetrate stubborn stains. DIY pastes solve this by keeping active oxidizers in direct contact with the mold.
- Hydrogen Peroxide & Baking Soda Paste (Gentle & Eco-Safe): Mix 3% hydrogen peroxide with arm-and-hammer baking soda until you achieve the consistency of thick frosting. Spread the paste generously over the caulk line using an old toothbrush. Let it sit for 20 to 30 minutes to oxidize organic stains. Scrub gently with soft nylon bristles, rinse with cold water, and dry thoroughly. This paste is also a great companion technique when learning how to clean grout the right way.
- The Bleach Paste Paper Towel Method (For Heavy Pigment Stains): Mix standard household bleach with baking soda into a thick paste. Apply it along the moldy caulk, then fold strips of paper towels or cotton coils and press them firmly against the wet paste. This protective wrap prevents premature drying, allowing the sodium hypochlorite to break down deep stains over several hours or overnight. Once finished, discard the paper towels, scrub lightly, rinse thoroughly with cool water, and pat completely dry.
Applying Gels and Sprays for Shower Caulk Mold Removal
Commercial mold stain remover gels offer high viscosity, clinging to vertical joints without slipping. Their formulated surfactants help break surface tension, allowing active agents to reach deep into microscopic surface textures.
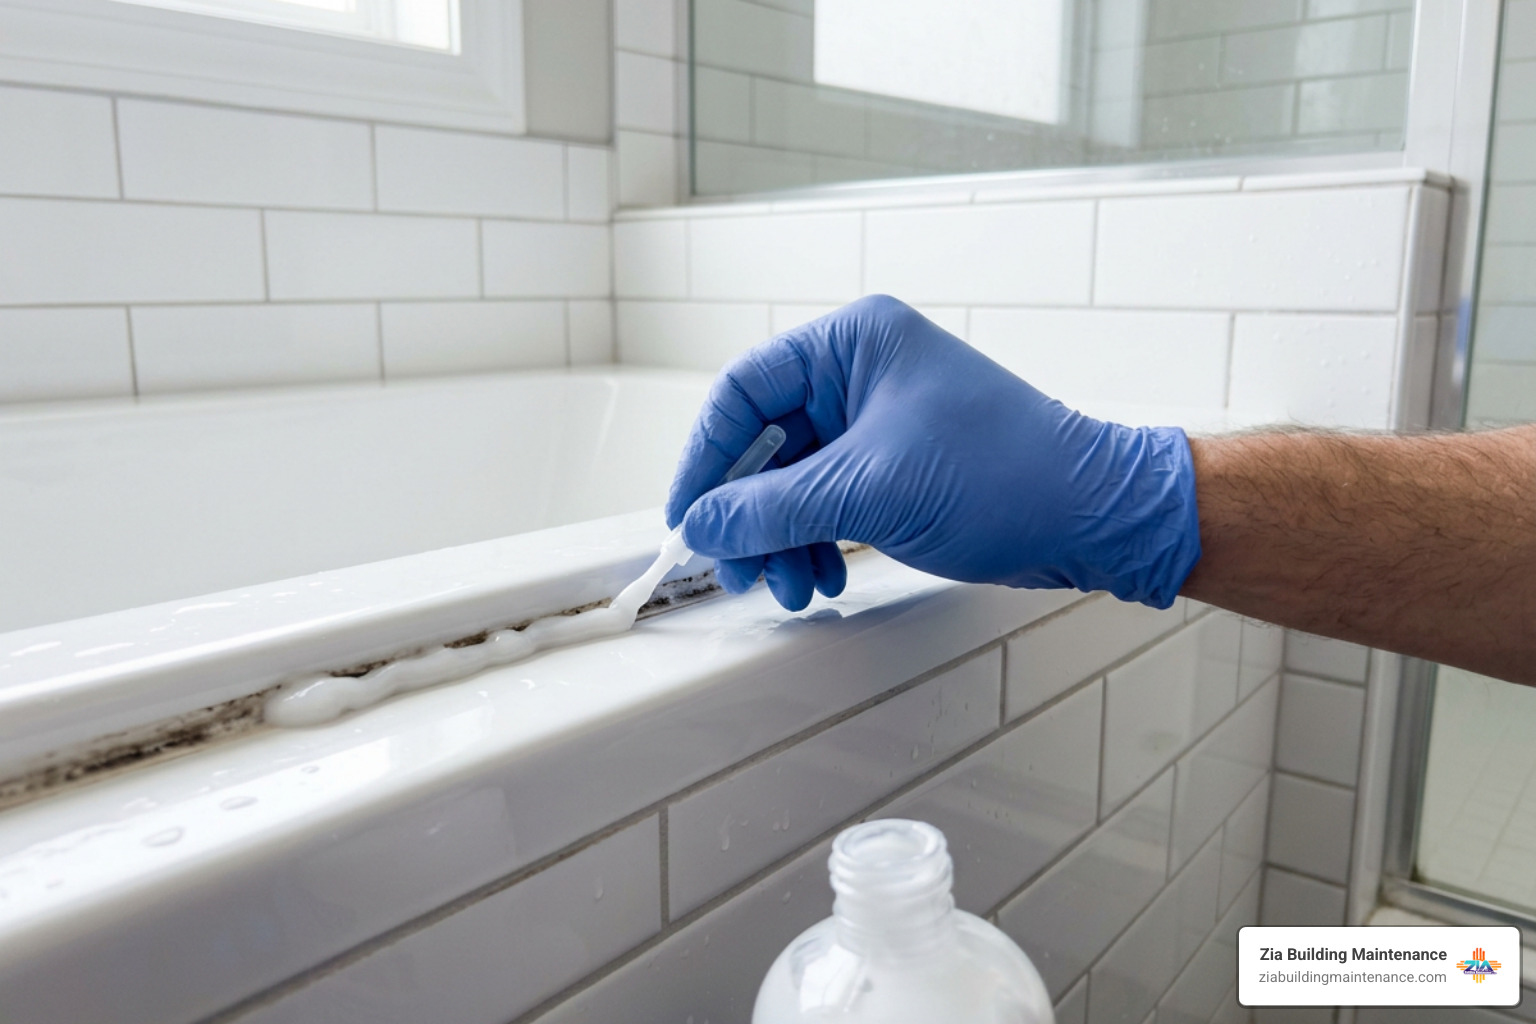
To get the most out of a mold gel or commercial spray:
- Dry the Surface First: Moisture creates a barrier. Towel-dry the caulk line completely before applying the product.
- Apply a Continuous Bead: Squeeze the gel nozzle directly over the caulk bead, covering the entire discolored area with a 1/8-inch layer.
- Allow Proper Dwell Time: Let the gel sit undisturbed for the full duration specified on the manufacturer label (typically 2 to 6 hours).
- Agitate and Rinse: Work a soft-bristled nylon brush along the joint to lift loosened biofilm. Rinse with cold or lukewarm water using a handheld shower wand. Avoid scalding water, which can stress silicone seals.
- Tackle Residual Soap Scum: If mineral scale or body oils remain on adjacent tile walls, pair your caulk cleaning with the best shower tub cleaner for tough scum to keep surrounding surfaces spotless.
Cleaning vs. Replacing: When Mold Compromises the Caulk Seal
One of the most frustrating bathroom maintenance scenarios is cleaning a dark caulk line only to watch the black stains return a few days later. When this happens, you are rarely dealing with surface grime—you are looking at structural seal failure.
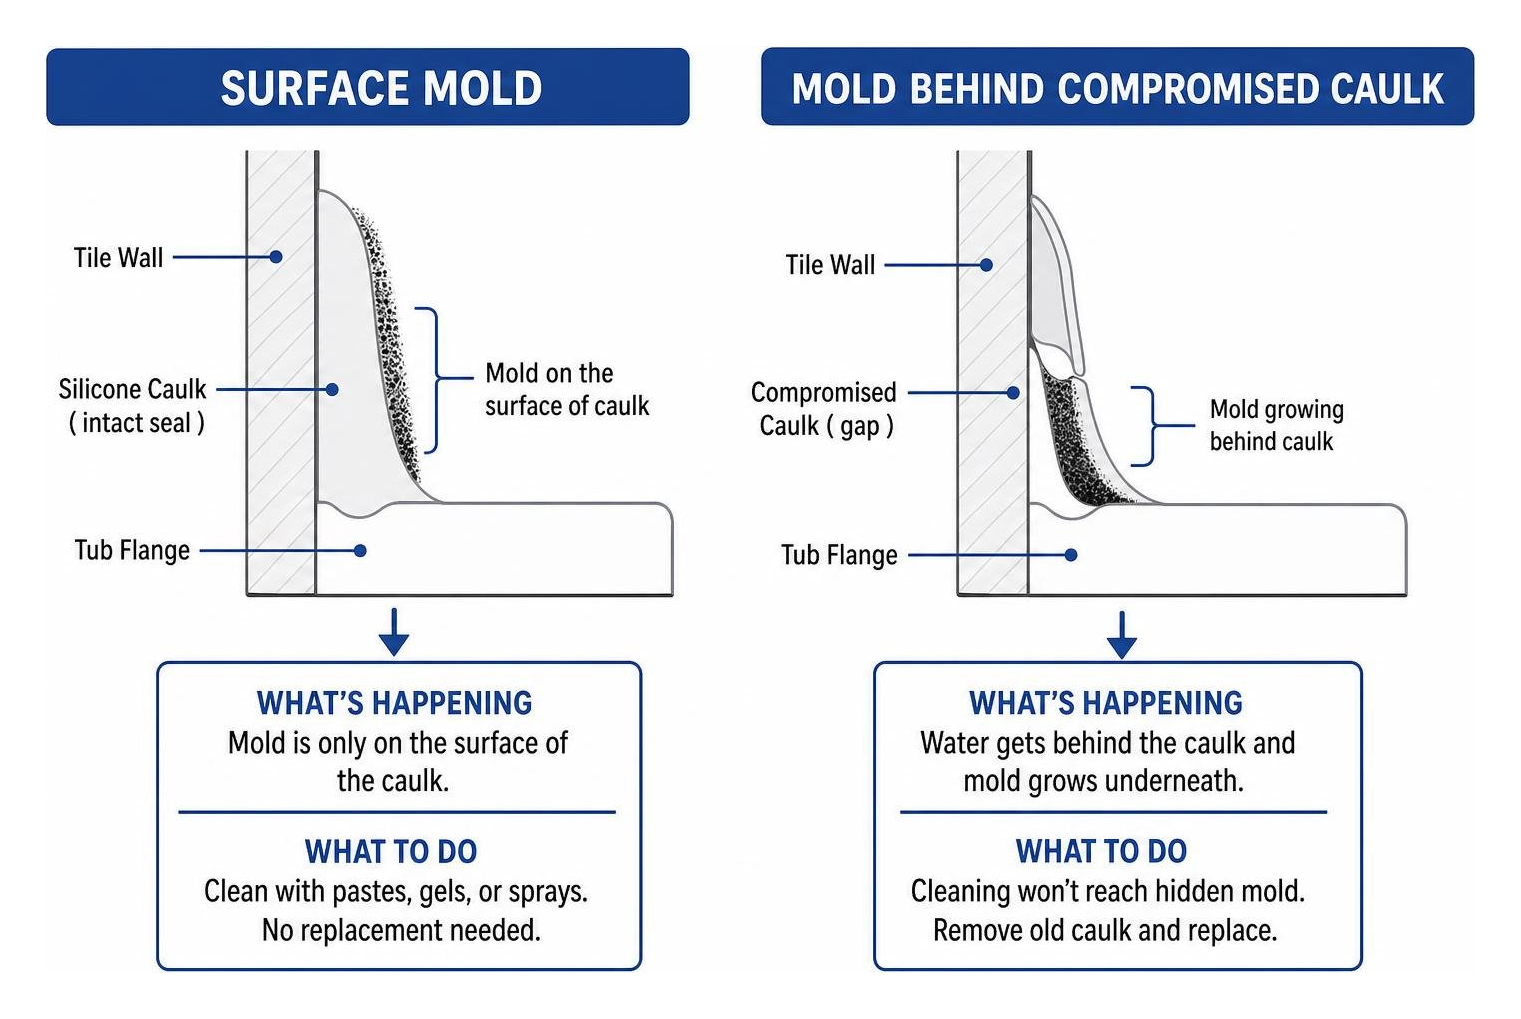
Silicone caulk has a natural operational lifespan of roughly 3 to 5 years in high-use shower environments. Over time, building movement, thermal expansion, chemical exposure, and mechanical stress cause the silicone to lose elasticity. Micro-fissures develop, allowing water and soap scum to seep behind the caulk bead.
Once moisture gets trapped between the tub flange and the back of the caulk, mold grows underneath the bead. Surface cleaners, gels, and sprays cannot penetrate through the solid waterproof front of the silicone to reach these hidden colonies.
Note on Safety: If mold growth extends beyond the caulk line and covers more than 10 contiguous square feet of wallboard or subfloor, skip the DIY approach. Large-scale structural intrusion requires containment and remediation. You can find detailed insights on structural air quality safety in How to Remove Moldy Caulk From Your Shower: A Detailed Guide | Indoor Air Quality Testing Ottawa.
Step-by-Step Guide to Replacing Moldy Caulking
If your shower caulk has lost its bond or mold is growing underneath, complete replacement is the only lasting solution. Follow this step-by-step process to restore a clean, waterproof seal.
wp:html
/wp:html
Step 1: Soften and Cut the Old Caulk Bead
Warming old silicone with a hairdryer on medium heat for 60 seconds helps soften the bond. Use a sharp utility knife or specialized caulk-cutting tool held at a 45-degree angle to score along the top edge (against the tile) and bottom edge (against the tub). Take care not to scratch delicate fiberglass or acrylic surfaces.
Step 2: Extract and Scrape the Joint
Grip the end of the scored caulk strip with needle-nose pliers and pull it away in steady ribbons. Use a rigid plastic razor scraper to remove residual silicone films. Avoid metal razor blades on acrylic tubs, as they can gouge the finish.
Step 3: Deep Clean and Disinfect the Exposed Seam
Scrub the open gap thoroughly with an old toothbrush dipped in 70% isopropyl rubbing alcohol or 3% hydrogen peroxide to kill dormant fungal spores lurking in the joint. Wipe away all loosened debris and dirt.
Step 4: Allow Complete 24-Hour Drying
Never caulk over a damp joint. Sealing residual moisture inside the wall joint guarantees rapid mold return behind your new caulk. Let the shower air out undisturbed for a full 24 hours. You can speed up the process by running a portable fan or dehumidifier pointed directly at the open seams.
Step 5: Tape the Joint for Crisp, Clean Lines
Apply high-adhesion blue painter’s tape along the wall tile and the tub ledge, leaving an exact 1/8-inch to 3/16-inch channel centered over the joint. This ensures neat, professional caulk lines without messy overspread.
Step 6: Apply Mold-Resistant 100% Silicone Sealant
Load a tube of premium kitchen-and-bath 100% silicone sealant (formulated with mold-inhibiting fungicides) into a caulking gun. Cut the plastic nozzle at a 45-degree angle to produce a bead size matching your joint gap. Squeeze the trigger with steady pressure while drawing the gun smoothly along the seam in one continuous motion.
Step 7: Tool the Bead and Pull Tape Promptly
Immediately smooth the wet bead using a silicone finishing tool or a gloved finger lightly dipped in a mist of water mixed with a drop of dish soap. Once the bead is smooth, pull the painter’s tape away at a 45-degree angle before the silicone begins to form a skin (within 3 to 5 minutes). Smooth down any slight raised edges with a light touch.
Step 8: Observe the 24 to 48 Hour Cure Window
Let the new silicone caulk cure completely undisturbed. While some quick-cure silicones claim water resistance in a few hours, waiting a full 24 to 48 hours ensures the core has cured into a flexible, watertight barrier before being exposed to water and steam.
Long-Term Prevention: Keeping Shower Caulk Mold-Free
Once your shower caulk is clean and sealed, daily moisture management will help keep mold from returning.
- Run Your Exhaust Fan Properly: Turn on your bathroom exhaust fan at the start of every shower and leave it running for at least 20 to 30 minutes after you finish. Ensure your ventilation system meets the standard capacity benchmark of at least 1 CFM per square foot of bathroom area (minimum 50 CFM overall).
- Squeegee After Every Use: Spend 30 seconds running a rubber squeegee down wet shower walls, glass doors, and along the tub rim. Removing standing water droplets reduces lingering room humidity by up to 75%.
- Keep Air Moving: Leave shower curtains spread open to dry, keep glass enclosure doors ajar, and leave the bathroom door open after bathing to help damp corners dry faster.
- Apply a Weekly Preventative Mist: Keep a spray bottle with a 50/50 mix of distilled water and white vinegar (or 3% hydrogen peroxide if you have natural stone tiles like marble) in the bathroom. Give the caulk perimeter a light mist once a week to discourage spores from settling on the surface.
- Wipe Down Soap Residue: Rinse away residual shampoo pools, hair, and soap lather from corners after every shower to remove the organic nutrients mold feeds on.
Frequently Asked Questions
Why does mold keep returning after I clean my shower caulk?
Mold keeps returning because topical cleaners only treat the surface. Fungal root structures (hyphae) can embed deeply into micro-cracks in aging silicone. If the caulk seal has pulled away from the wall, mold colonies thrive in the dark, damp space behind the bead where surface sprays cannot reach. If black spots return within days of cleaning, the caulk has lost its seal and needs to be replaced.
Can bleach permanently damage bathroom silicone caulk?
Yes, frequent use of concentrated chlorine bleach can degrade silicone caulk over time. Sodium hypochlorite can cause chemical embrittlement, making the sealant stiff, chalky, and prone to micro-cracking. These tiny fissures create entry points for water and mold spores. Gentler alternatives like 3% hydrogen peroxide or specialized pH-balanced mold gels lift stains effectively without compromising the silicone’s elasticity.
How long must new shower caulk dry before using the shower?
Most 100% kitchen-and-bath silicone caulks require 24 to 48 hours to cure fully before handling direct water spray and humidity. Exposing fresh caulk to water too early can wash away biocide additives, disrupt the chemical bond against the tile, and trap moisture inside the bead, leading to premature failure and mold growth.
Conclusion
Maintaining fresh, mold-free shower caulking comes down to two simple steps: catching surface mold early with the right cleaners and knowing when it is time to replace a compromised seal. By pairing regular cleanings with good ventilation and a quick daily squeegee routine, you can protect your bathroom finishes and maintain a fresh, healthy space.
For commercial properties, fitness centers, offices, and multi-tenant facilities across Albuquerque, Rio Rancho, Corrales, and Los Ranchos, maintaining spotless, hygienic restrooms requires dedicated consistency and attention to detail.
Since 1989, Zia Building Maintenance has delivered reliable, high-standard janitorial services tailored to commercial spaces of all sizes. When your facility needs restorative care or dependable ongoing maintenance, explore our specialized commercial bathroom cleaning service to keep every restroom fresh, safe, and welcoming.